Take Me to the Recipes
Welcome to a delectable journey into the world of Chinese desserts! Get ready to satisfy your sweet cravings with our handpicked selection of 41 irresistibly delicious recipes.
From classic favorites to unique and innovative treats, this collection captures the essence of Chinese culinary artistry. Whether you’re a dessert enthusiast or looking to explore new flavors, these recipes promise a delightful adventure for your taste buds.
Join us on this culinary escapade and discover the joy of creating authentic and mouthwatering Chinese desserts in your own kitchen. Get ready to sweeten up your life with these tantalizing treats!
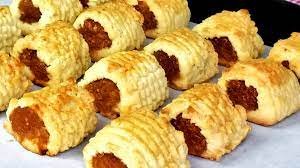
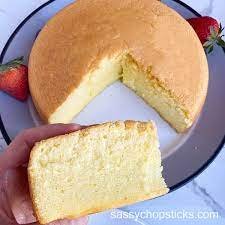
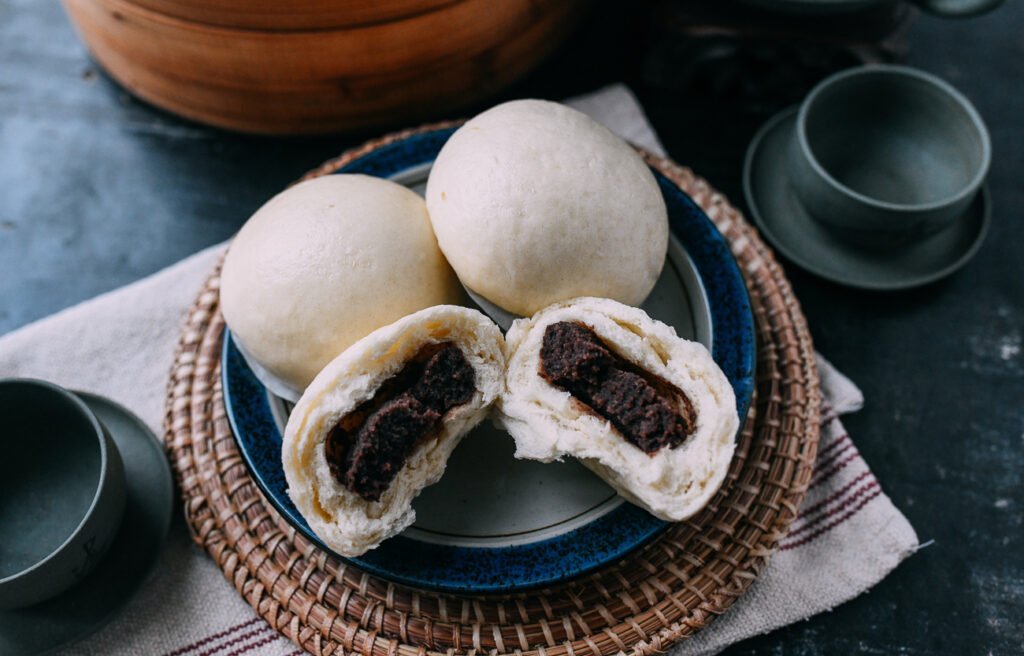
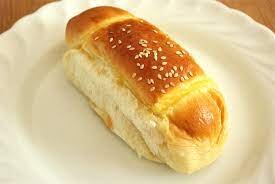
Savor iconic Chinese Desserts – Click on each tantalizing picture to open up the Recipe
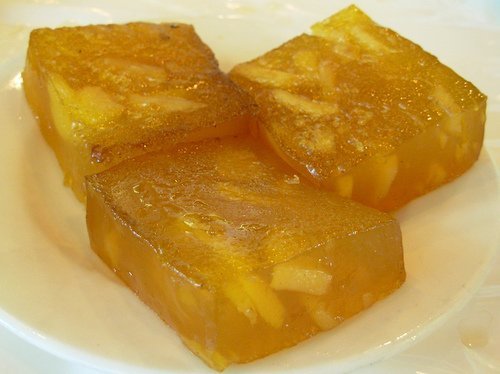
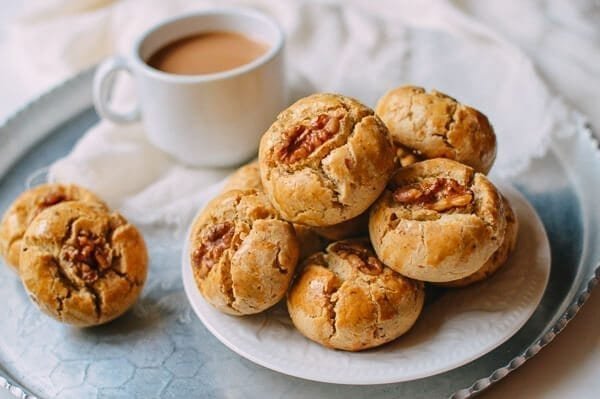
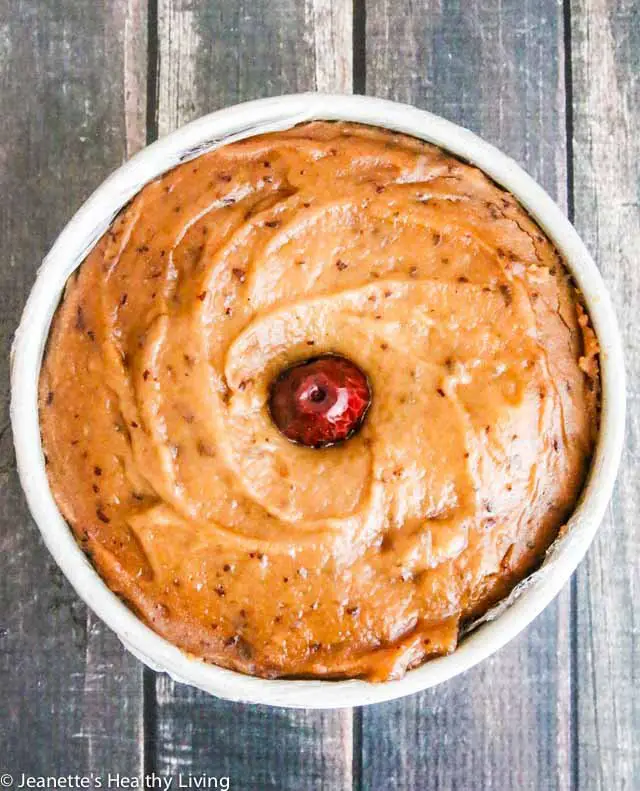
Other Articles for You



- Chinese Food – A delightful exploration
- 24 Chinese Beef Recipes
- 48 Mouthwatering Chinese Vegan Food Recipes
- 41 Irresistible Sweet Chinese Desserts
- North and South American Cuisine – A Culinary Expedition
- European Cuisine: Savor the Continent’s Best Culinary Secrets!
- African Cuisine: Discover the Bold Flavors & Global Charm!
- Asian Cuisine Unlock its Secrets – Taste, Health & Global Influence!
- Oceania Cooking: A Culinary Journey Through the Pacific
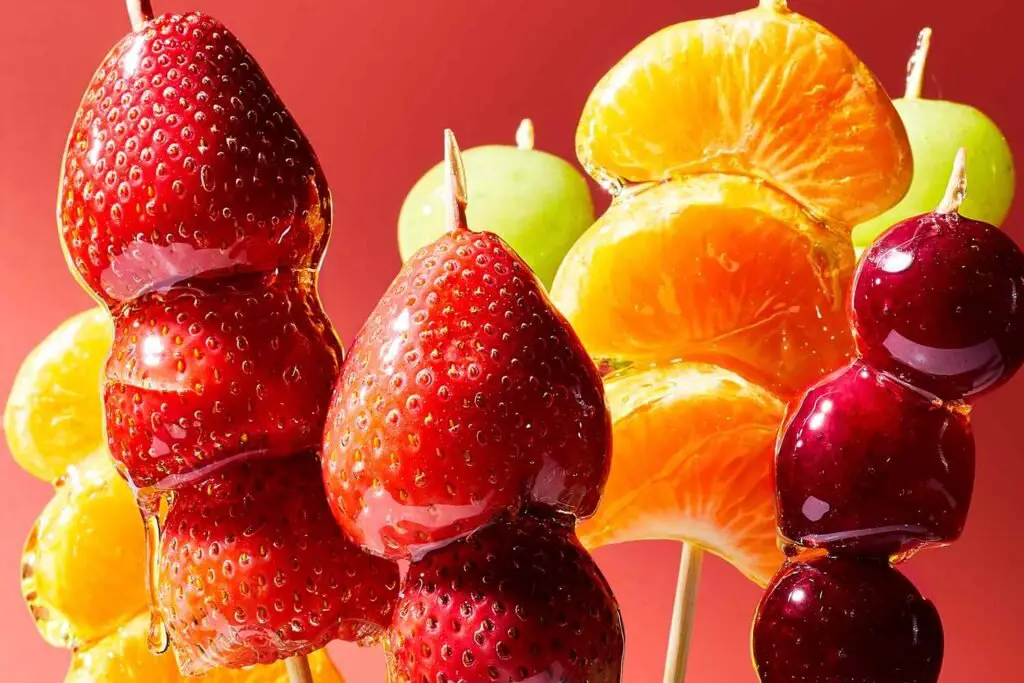
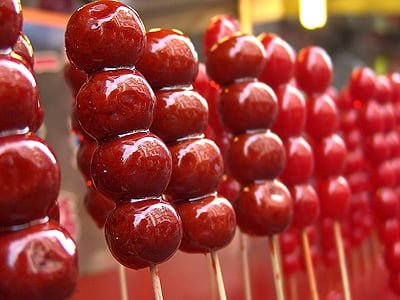
Chinese Desserts – Tanghulu, Candied Fruits

History and Background
- Origin: Tanghulu, also known as Bingtanghulu, is a traditional Chinese snack that originated in northern China, particularly in Beijing.
- Cultural Significance: Tanghulu has been a popular street food and festival treat for centuries. It’s often associated with celebrations and festive occasions.
- Traditional Occasions: Tanghulu is commonly enjoyed during the Chinese New Year, Lantern Festival, and other traditional festivals.
- Evolution: While the classic Tanghulu is made with hawthorn berries, modern versions include a variety of fruits like strawberries, grapes, and kiwi.
Chinese Desserts – Tanghulu, Candied Fruits Ingredients
- Fruits: Choose a variety of fruits such as hawthorn berries, strawberries, grapes, kiwi, or other firm fruits.
- Sugar: White granulated sugar is commonly used for the candy coating.
- Skewers: Long bamboo skewers for dipping the fruits into the sugar syrup.
- Water: To dissolve and cook the sugar.
- Optional Flavorings: Some recipes may include additional flavorings like vanilla extract or a drop of food coloring for visual appeal.
Chinese Desserts Recipe – Tanghulu, Candied Fruits
Preparation
Select Fruits
- Choose fresh and firm fruits. Wash and thoroughly dry them before use.
- If using hawthorn berries, remove the seeds.
Skewering:
- Skewer the fruits onto bamboo sticks. Ensure they are secure and evenly spaced.
Candy Coating
Prepare Sugar Syrup:
- In a saucepan, combine 1 cup of sugar with 1/2 cup of water.
- Heat over medium heat, stirring until the sugar dissolves.
Cook Sugar Syrup:
- Bring the sugar syrup to a gentle boil. Use a candy thermometer to monitor the temperature.
Candy Consistency:
- Continue boiling until the sugar syrup reaches the hard crack stage (300°F or 149°C).
Candying Fruits
Dip Fruits:
- Carefully dip each skewered fruit into the hot sugar syrup, ensuring an even coating.
- Place the coated fruits on parchment paper or a silicone mat to cool and harden.
- If the candy coating is too thin, repeat the dipping process for a thicker layer.
Serve
- Once the candy coating has hardened, Tanghulu is ready to be enjoyed. Serve immediately.
Notes:
- Be cautious when working with hot sugar syrup to avoid burns.
- Experiment with different fruits and colors for variety.
- Tanghulu is best when consumed soon after preparation for a crisp texture.
This recipe offers a basic guide, and variations may exist based on regional preferences and personal adaptations.
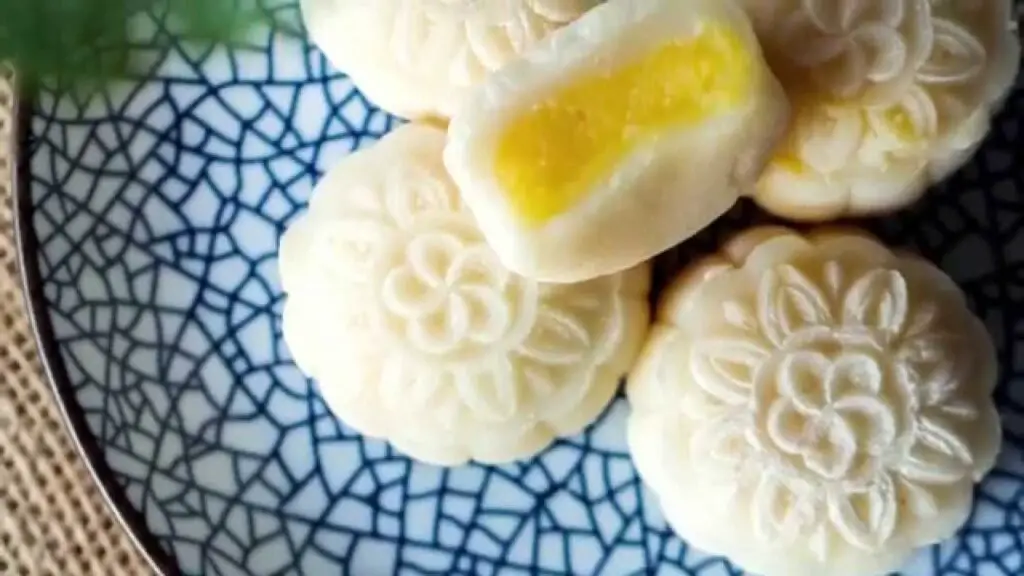
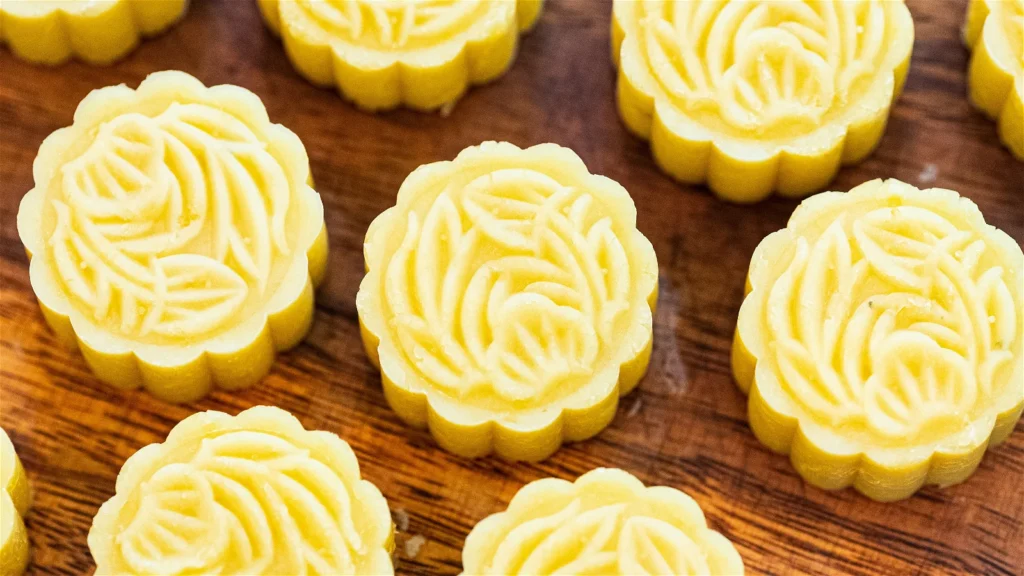
Chinese Desserts – Snow Skin Mooncake – Recipe with Custard Filling

History and Background
- Origin: Snow Skin Mooncakes, also known as Bing Pi Yue Bing, are a modern variation of traditional mooncakes that originated in China. The traditional mooncake has a baked crust, but the Snow Skin Mooncake features a soft, chewy, and slightly translucent “snow skin” made from glutinous rice flour.
- Popularity: Snow Skin Mooncakes gained popularity in Hong Kong and parts of southern China, providing a refreshing alternative to the more dense and sweet traditional mooncakes.
- Custard Filling Innovation: While Snow Skin Mooncakes can be filled with various ingredients, including fruits and sweet bean pastes, the custard filling adds a creamy and luscious texture, appealing to a wide range of tastes.
Chinese Desserts – Snow Skin Mooncake Ingredients
For Snow Skin:
- 200g glutinous rice flour
- 30g rice flour
- 70g icing sugar
- 30g shortening or vegetable oil
- 200ml water
- A pinch of salt
- Potato starch or glutinous rice flour for dusting
Custard Filling:
- 150ml coconut milk
- 100ml whole milk
- 3 egg yolks
- 80g sugar
- 40g cornstarch
- 30g unsalted butter
- A pinch of salt
- 1 tsp vanilla extract
For Assembly:
- Mooncake molds
- Some plastic wrap
Chinese Desserts – Recipe: Snow Skin Mooncake with Custard Filling
Snow Skin Preparation
- In a bowl, mix glutinous rice flour, rice flour, icing sugar, and a pinch of salt.
- In a separate bowl, combine water and shortening (or vegetable oil). Heat in the microwave until the shortening is melted.
- Gradually add the wet ingredients to the dry ingredients, stirring continuously to form a smooth batter.
- Strain the batter to ensure a silky texture.
- Cook the batter over low heat, stirring continuously until it thickens into a paste.
- Let the paste cool completely. Once cooled, knead it until smooth.
- Divide the snow skin dough into small portions, about 25g each, and shape them into balls.
Custard Filling Preparation
- In a saucepan, heat coconut milk, whole milk, and sugar over medium heat until it begins to simmer.
- In a separate bowl, whisk egg yolks and cornstarch until smooth.
- Gradually pour the hot milk mixture into the egg yolk mixture, whisking constantly.
- Return the mixture to the saucepan and cook over low heat, stirring continuously, until it thickens.
- Remove from heat, add butter, salt, and vanilla extract. Mix until well combined. Let it cool.
Assembly
- Flatten a snow skin dough ball into a disc, using potato starch or glutinous rice flour to prevent sticking.
- Place a spoonful of custard filling in the center and wrap the dough around the filling, sealing it carefully.
- Dust the mooncake mold with potato starch or glutinous rice flour, then press the filled dough into the mold.
- Carefully release the mooncake from the mold and wrap it with plastic wrap.
- Repeat the process for the remaining dough and filling.
Chilling:
Refrigerate the mooncakes for at least 4 hours or until set.
Serve:
Once set, Snow Skin Mooncakes with Custard Filling are ready to be served. Enjoy these delightful treats!
Note: You can find video recipes on platforms like YouTube for visual guidance in the preparation and assembly process.
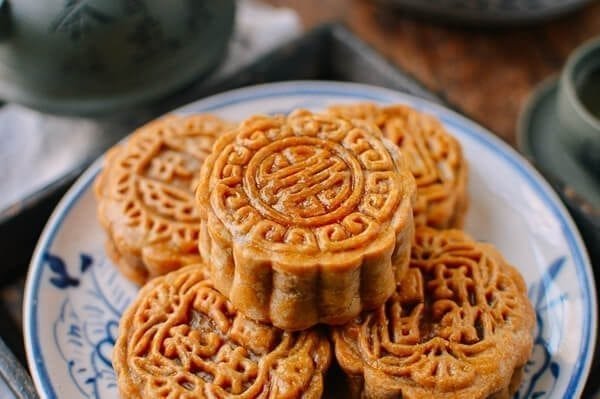
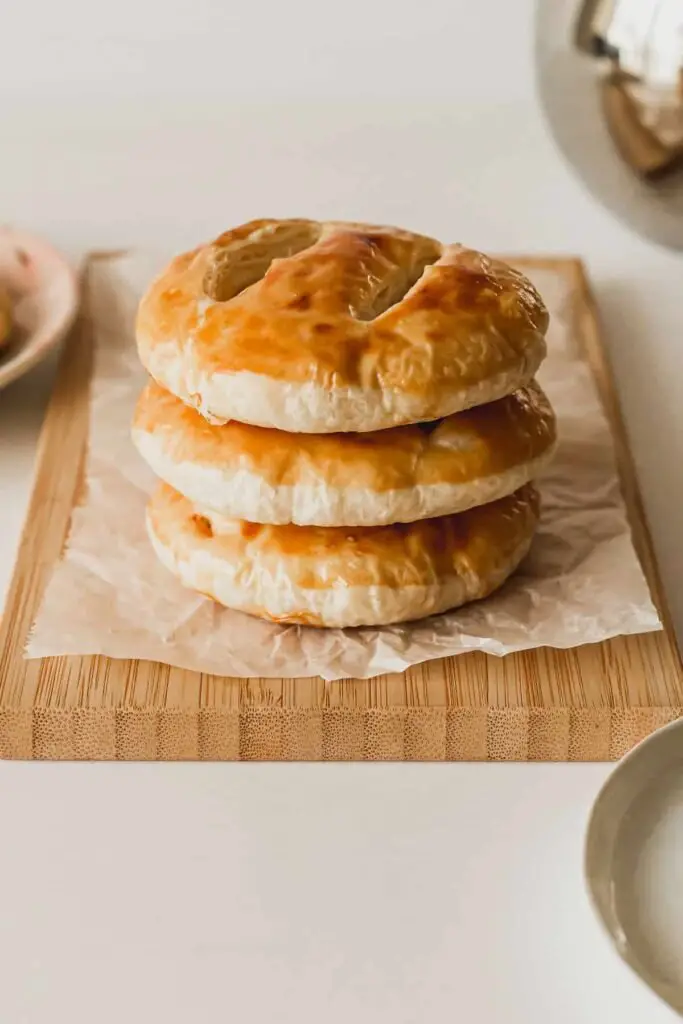
Chinese Food – Mooncake Yue Bing Recipe

History and Background
Mooncakes, known as Yue Bing in Chinese, have a rich history dating back over 1,000 years to the Tang Dynasty in China. Originally, mooncakes were associated with the Mid-Autumn Festival, symbolizing reunion and togetherness among family members.
They are often given as gifts during this festival.
Mooncakes are round, symbolizing the full moon and completeness. They traditionally have a dense, sweet filling surrounded by a thin, tender pastry crust.
Over the centuries, mooncakes have evolved, and various regional styles have emerged, each with unique ingredients and flavors.
Chinese Food – Mooncake Yue Bing Recipe Ingredients
The Pastry
- 150g all-purpose flour
- 100g golden syrup
- 40g vegetable oil
- 1/2 teaspoon alkaline water (lye water)
- Egg yolk wash (for brushing on top)
The Filling
- Traditional Fillings (choose one or a combination):
- Lotus seed paste
- Red bean paste
- Five kernels (mix of chopped nuts and seeds)
- Salted duck egg yolks (optional)
Egg Wash
- 1 egg yolk
- 1 tablespoon water
- Mooncake molds (with desired patterns)
- Extra flour for dusting
Chinese Food – Mooncake Yue Bing Recipe Ingredients Recipe
Pastry Dough Preparation
- In a mixing bowl, combine all-purpose flour, golden syrup, vegetable oil, and alkaline water.
- Mix the ingredients until a dough forms.
- Cover the dough and let it rest for at least 2 hours, or overnight, to allow it to mature.
Filling Preparation
- Divide the filling into small portions, usually about 25-30g each, and shape them into balls.
- If using salted duck egg yolks, wrap each yolk with the desired amount of filling.
Assembling Mooncakes
- Preheat the oven to 350°F (180°C).
- Take a portion of the pastry dough and roll it into a ball.
- Flatten the ball into a small disc and place a portion of the filling in the center.
- Wrap the filling with the pastry dough, ensuring it is completely covered.
- Dust the assembled mooncake with a bit of flour and press it into a mooncake mold to give it shape. Release from the mold.
- Place the shaped mooncakes on a baking tray lined with parchment paper.
Egg Wash and Baking
- Prepare the egg wash by beating the egg yolk with water.
- Brush the top of each mooncake with the egg wash for a golden finish.
- Bake in the preheated oven for about 15 minutes.
- After 15 minutes, remove the mooncakes and let them cool for 10-15 minutes.
Double-Baking (Optional)
- After the initial cooling, brush the mooncakes again with egg wash.
- Return them to the oven and bake for an additional 10-15 minutes until golden brown.
Cooling and Storage
- Allow the mooncakes to cool completely before serving.
- Traditional mooncakes are often best enjoyed after a day or two when the flavors meld.
Serve
Serve the mooncakes at room temperature and enjoy this traditional Chinese delicacy, especially during the Mid-Autumn Festival.
Note: This recipe yields traditional mooncakes with a flaky pastry crust and a sweet, dense filling. Feel free to experiment with different fillings and variations based on personal preferences.
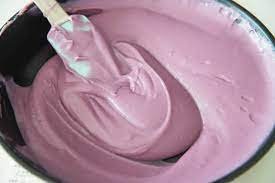
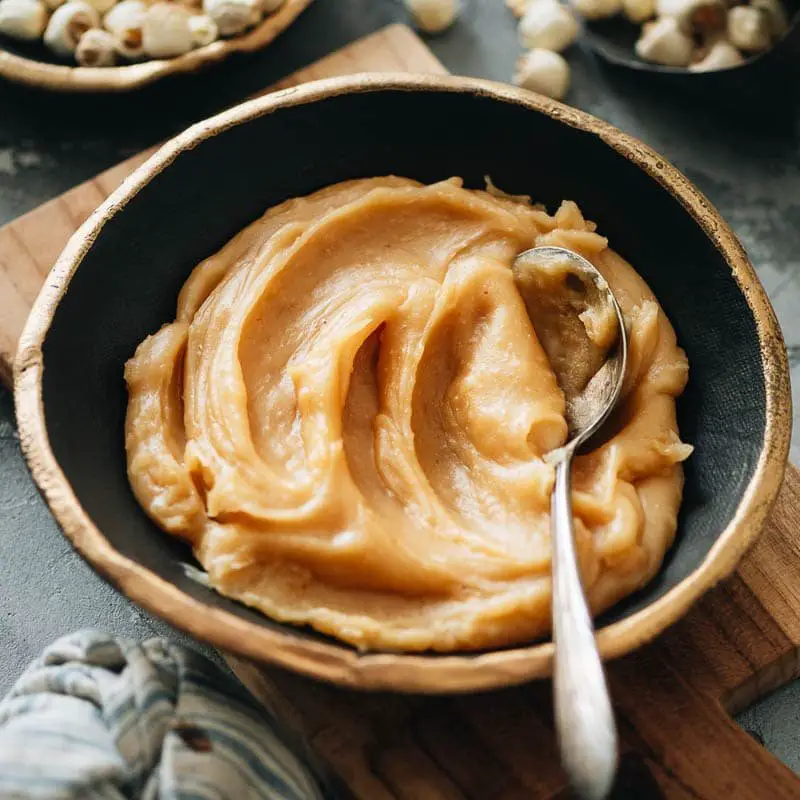
Taro Paste – Creamy Purple Taro Root Paste

History and Background
The Paste is a sweet and creamy filling made from taro root, has a long history in Chinese cuisine. It is a versatile ingredient used in both savory and sweet dishes. Taro paste is commonly found in traditional Chinese desserts and pastries.
It is often associated with good luck and prosperity in Chinese culture, making taro-based desserts popular for celebrations and festive occasions.
Taro Paste – Creamy Purple Taro Root Paste Ingredients
The Paste
- 500g taro root, peeled and diced (Taro root serves as the essential ingredient for crafting Taro Paste and holds an irreplaceable role in the recipe. These roots are readily accessible in stores, offering the option to buy pre-peeled roots or opt for the entire root based on personal preferences.)
- Ube (Ube is employed to enhance the vivid purple hue. You have the option to substitute fresh ube with ube powder or omit Ube altogether. Nevertheless, taro paste lacking Ube will have a rather subdued color, presenting a very light shade of purple.)
- 150g granulated sugar (adjust to taste)
- 100g coconut milk
- 50g unsalted butter
- A pinch of salt
Cooking Taro
- Water for boiling taro
Taro Paste – Creamy Purple Taro Root Paste Recipe
Preparing Taro
- Peel the taro root and cut it into small, uniform cubes. (This vegetable root might irritate your skin; hence, it is advised to wear gloves or coat your hands with vinegar to prevent irritation.)
- Rinse the taro cubes under cold water to remove excess starch.
Cooking Taro
- In a pot, bring water to a boil.
- Add the taro cubes to the boiling water and cook until they are fork-tender (approximately 15-20 minutes).
- Drain the cooked taro cubes and let them cool slightly.
Making Taro Paste
- In a food processor or blender, puree the cooked taro cubes and ube until smooth.
- Add a small amount of water if needed.
- In a pan over medium heat, melt the unsalted butter.
- Add the taro puree to the melted butter, stirring continuously.
- Gradually add sugar and continue stirring until the sugar dissolves.
- Pour in the coconut milk and a pinch of salt. Stir well to combine.
- Continue cooking the mixture over medium heat, stirring constantly, until it thickens to a paste-like consistency.
Adjusting Sweetness
- Taste the taro paste and adjust the sweetness according to your preference by adding more sugar if needed.
- Continue cooking until the taro paste reaches the desired thickness.
- Once the taro paste has reached the desired consistency, remove it from heat and let it cool to room temperature.
- Store the taro paste in an airtight container in the refrigerator for future use.
Serve
- Use the creamy purple taro paste as a filling for various Chinese desserts, such as taro buns, taro-filled pastries, or as a topping for sweet soups and puddings.
- Enjoy the unique and delightful flavor of this traditional Chinese sweet treat.
Note: The sweetness of the taro paste can be adjusted to suit personal preferences. Some recipes may include variations such as adding mashed taro chunks for texture or incorporating additional flavorings like vanilla extract.
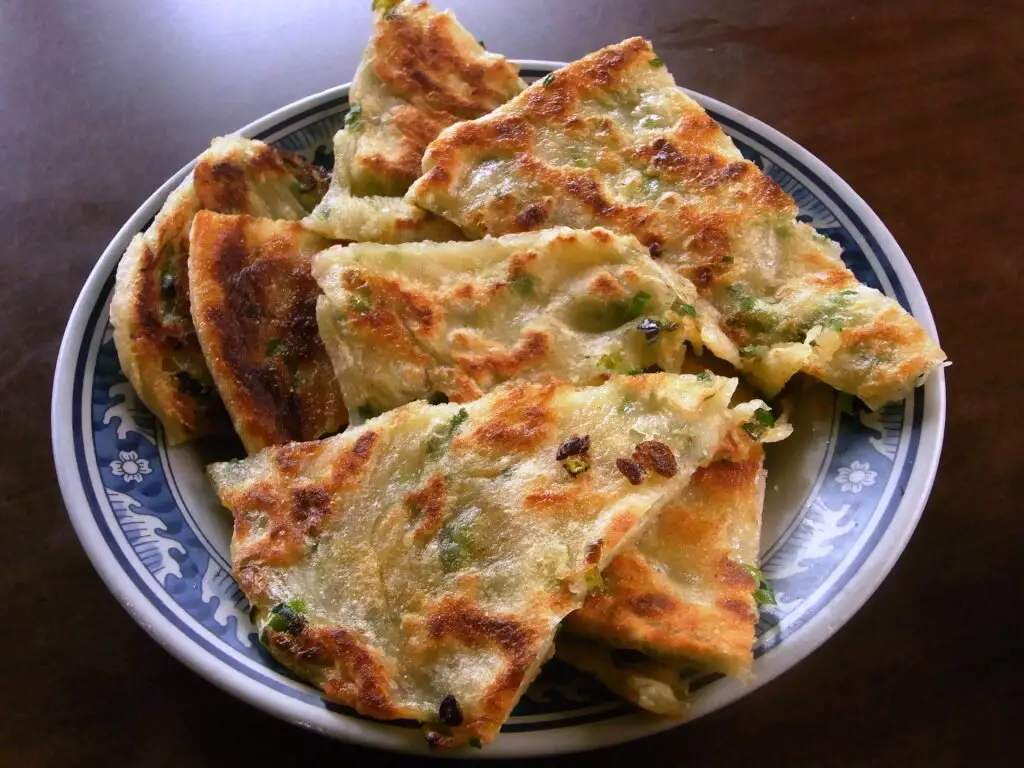
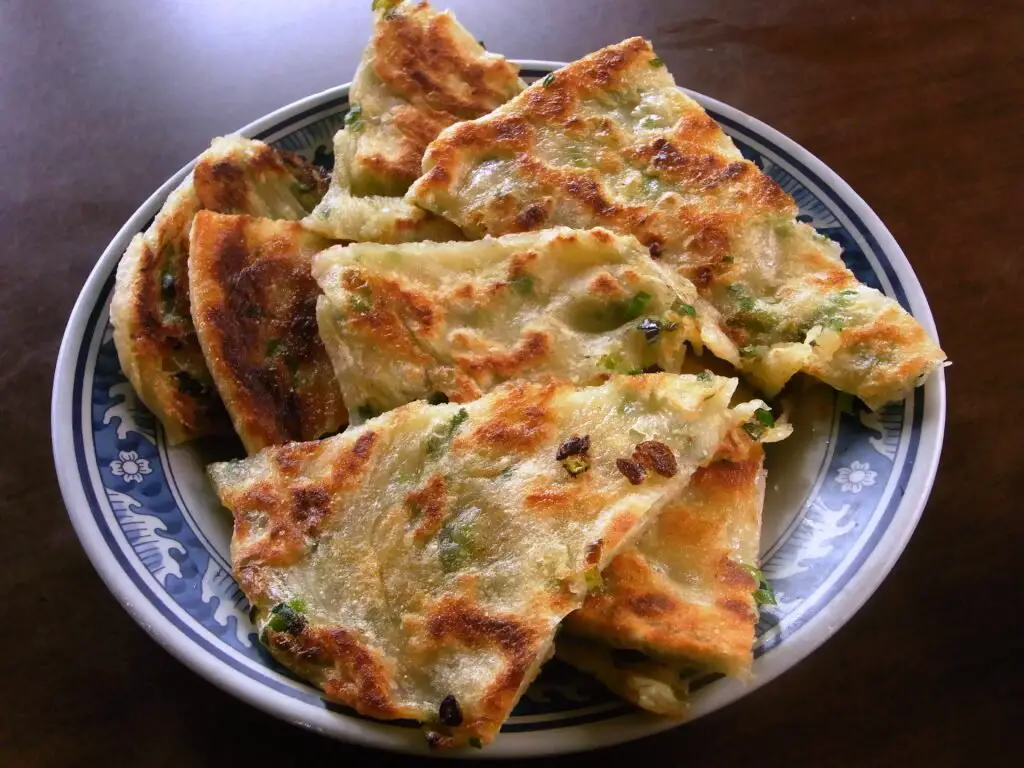
Chinese Desserts – Scallion Pancakes (Cong You Bing)

History and Background
- Origin: Scallion Pancakes, known as Cong You Bing in Chinese, have a long history and are a popular street food in China.
- Regional Origin: While enjoyed throughout China, scallion pancakes are particularly associated with northern Chinese cuisine, where they are a breakfast staple and enjoyed as snacks.
- Cultural Significance: Scallion pancakes showcase the versatility of simple ingredients and reflect the Chinese culinary emphasis on textures and flavors.
Chinese Desserts – Scallion Pancakes (Cong You Bing) Ingredients
For the Dough
- 2 cups all-purpose flour
- 1 cup boiling water
- Cold water for adjustments
- 1 tablespoon sesame oil
Filling
- 1 cup finely chopped scallions (green onions)
- Salt to taste
- Vegetable oil for cooking
Chinese Desserts – Scallion Pancakes (Cong You Bing) Recipe
Dough Preparation
- In a large mixing bowl, add the all-purpose flour.
- Gradually pour in the boiling water while stirring the flour with chopsticks or a wooden spoon.
- Continue stirring until the dough starts to come together.
- Allow the dough to cool slightly, then knead it until it forms a smooth ball.
- Cover the dough with a damp cloth and let it rest for at least 30 minutes.
Filling Preparation
- Finely chop the scallions.
- Season the chopped scallions with salt, tossing them to distribute the salt evenly.
Assembling the Pancakes
- Divide the rested dough into small balls, about the size of a golf ball.
- Take one ball and roll it into a thin, flat disc on a floured surface.
- Brush the disc with a thin layer of sesame oil.
- Sprinkle a portion of the salted scallions over the oiled surface.
- Roll the disc into a log, then coil it into a round dough ball.
- Flatten it into a pancake shape again.
- Repeat for the remaining dough balls.
Cooking the Pancakes
- Heat a skillet or frying pan over medium heat and add a bit of vegetable oil.
- Place a pancake in the pan and cook until the bottom is golden brown.
- Flip the pancake and cook the other side until golden brown as well.
- Repeat the process for the remaining pancakes, adding more oil as needed.
Serving
- Once cooked, transfer the scallion pancakes to a cutting board and cut them into wedges.
- Serve the pancakes hot with dipping sauce, such as soy sauce mixed with a bit of rice vinegar or chili oil.
Scallion pancakes are best enjoyed hot, with a crispy exterior and a flavorful, savory filling.
Note: Scallion pancakes can be customized by adding additional ingredients like minced garlic or sesame seeds to the filling. The recipe provided is a basic version, and variations exist based on personal preferences and regional differences.
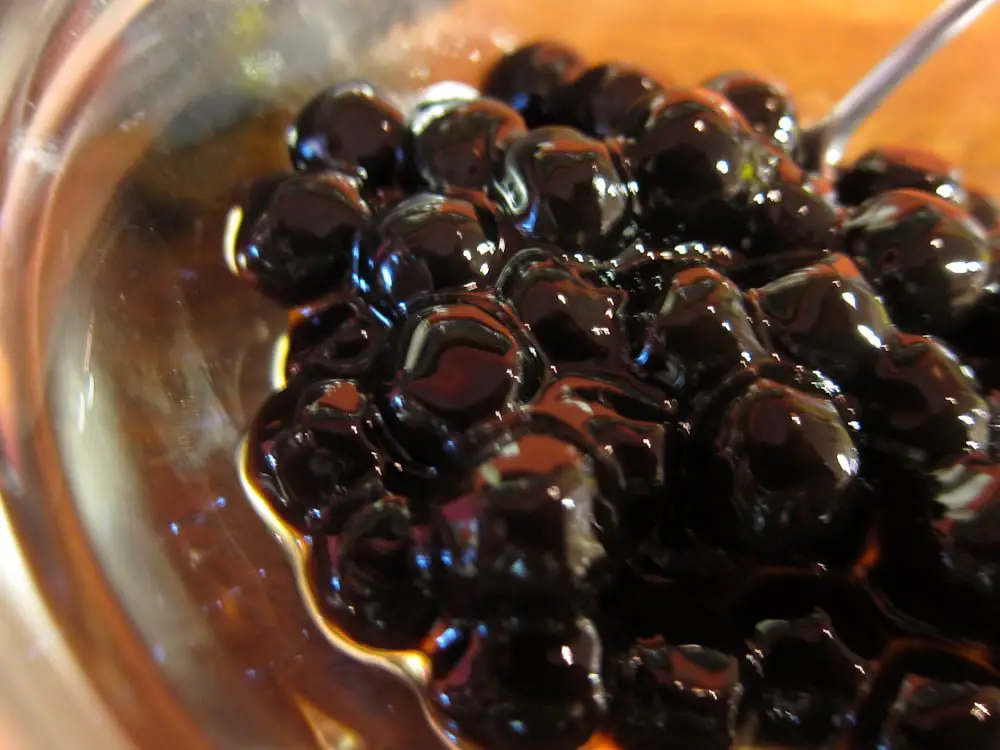
Chinese Desserts – Boba Pearls (Tapioca Pearls)

Background
Boba pearls, also known as tapioca pearls, are chewy spheres made from tapioca starch. They are usually added to bubble tea, a tea-based drink that originated in Taiwan in the early 1980s. The name boba comes from a Taiwanese slang word for breasts, referring to the round shape of the pearls.
They are now a staple ingredient in many bubble tea shops and flavors.
Chinese Desserts – Boba Pearls Ingredients
To make your own boba pearls at home, you will need the following ingredients:
- 60 g water (1/4 cup)
- 45 g Taiwanese brown sugar (about 5 tablespoons loosely measured)
- 120 g tapioca flour (about 3/4 cup), plus more for dusting
Chinese Desserts – Boba Pearls Recipe
Here is the recipe for making boba pearls:
- Combine water and brown sugar in a small saucepan and bring to a boil over medium heat.
- While the liquid is boiling, add about 1/3 to half of the tapioca flour and stir constantly until it forms a very sticky dough.
- Remove the pan from the heat and add the rest of the tapioca flour, stirring until the dough comes off the bottom of the pan.
- Transfer the dough to a work surface and knead until smooth. If the dough is too dry, add some cold water.
- Take a portion of the dough and roll it into a thin log, about 1/3 inch thick. Cut the log into small pieces, slightly smaller than the size of the boba pearls you want. Roll each piece into a ball and dust with some tapioca flour to prevent sticking. Repeat with the rest of the dough.
- To cook the boba pearls, bring a large pot of water to a boil. Add the boba pearls and stir gently to prevent them from sticking to the bottom. Boil for about 15 to 20 minutes, or until they float to the surface and become translucent. Stir occasionally to ensure even cooking.
Drain the boba pearls and rinse with cold water to stop the cooking process. Transfer them to a bowl and add some brown sugar syrup to sweeten and preserve them. You can make the syrup by boiling some water and brown sugar together until slightly thickened.
Enjoy your homemade boba pearls with your favorite bubble tea drink! You can store the cooked boba pearls in the fridge for up to 3 days, or freeze them for longer storage. To reheat them, just microwave them with some water or syrup until soft and chewy.
Chinese Dessert – Mung Bean Mooncakes

History
- Origin: Mooncakes are a traditional Chinese pastry often associated with the Mid-Autumn Festival (also known as the Moon Festival). The festival is a time for families to come together and celebrate the harvest moon.
- Significance: Mooncakes symbolize unity and completeness, and they are often gifted to friends and family during the festival.
- Evolution: While traditional mooncakes are filled with sweet bean paste, the variety of fillings has expanded over time to include various flavors, including mung bean.
Region of China
- Mooncakes are enjoyed throughout China and other East Asian countries during the Mid-Autumn Festival. Variations in mooncake recipes and fillings can be found across different regions.
Chinese Dessert – Mung Bean Mooncakes Ingredients
For the Mung Bean Filling
- 1 cup split mung beans
- 1/2 cup sugar
- 1/4 cup vegetable oil
- 1/4 cup water
Mooncake Dough
- 2 cups all-purpose flour
- 1/2 cup powdered sugar
- 1/2 cup unsalted butter, melted
- 1/4 cup water
- 1/2 teaspoon baking soda
For the Mooncake Glaze
- 1 egg yolk, beaten (for egg wash)
Recipe
Mung Bean Filling
- Rinse the split mung beans and soak them in water for 2 hours.
- Drain the beans and steam them until they are soft.
- In a blender or food processor, blend the cooked mung beans with sugar, vegetable oil, and water until smooth.
- Cook the mung bean paste in a pan over medium heat until it thickens. Allow it to cool.
Mooncake Dough
- In a large bowl, mix the all-purpose flour, powdered sugar, melted butter, water, and baking soda.
- Knead the dough until it is smooth and elastic. Let it rest for 30 minutes.
Assembling Mooncakes
Assembling Mooncakes
- Preheat the oven to 350°F (180°C).
- Divide the mung bean paste into equal portions and shape them into balls.
- Divide the mooncake dough into portions slightly larger than the mung bean balls.
- Flatten each dough portion and wrap it around a mung bean ball, ensuring the filling is completely enclosed.
Shaping and Glazing
- Dust mooncake molds with flour.
- Press each filled dough ball into the mold to shape the mooncake.
- Place the shaped mooncakes on a baking sheet lined with parchment paper.
- Brush the tops of the mooncakes with beaten egg yolk for a shiny finish.
Baking
- Bake the mooncakes in the preheated oven for about 15-20 minutes or until they turn golden brown.
Cooling and Serving
- Allow the mooncakes to cool on a wire rack before serving.
- Mooncakes are traditionally enjoyed with Chinese tea during the Mid-Autumn Festival.
Note: Mooncakes can be stored in an airtight container for several days, allowing the flavors to meld.
Now you have a delightful recipe for Mung Bean Cake Mooncakes, a unique and tasty variation of the traditional mooncake. Enjoy them during the Mid-Autumn Festival or as a sweet treat any time of the year!
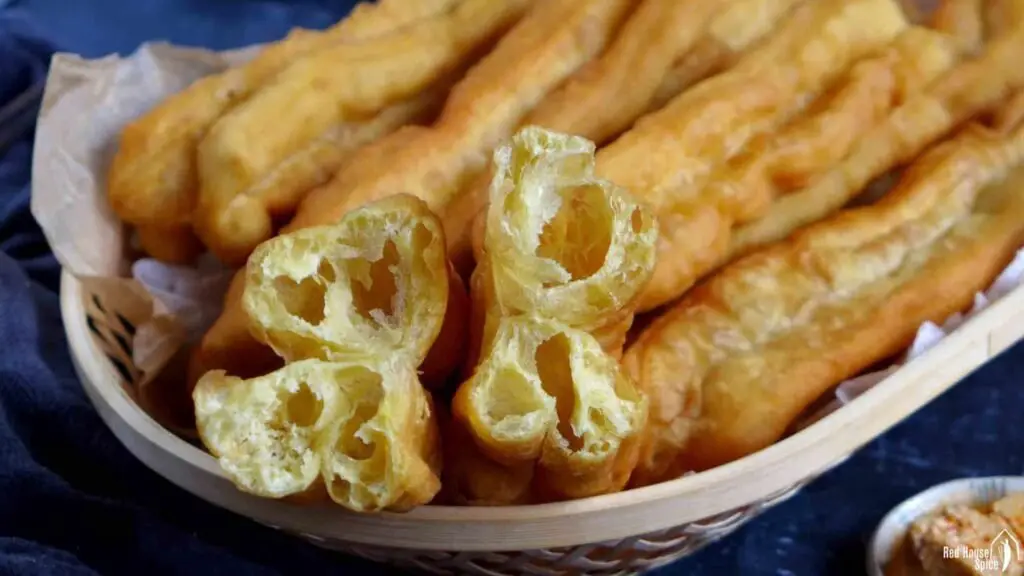
Chinese Desserts – Youtiao-Chinese Doughnut Sticks

History
- Origin: Youtiao, also known as Chinese doughnut sticks, has a long history in Chinese cuisine, dating back to the Song Dynasty (960–1279).
- Cultural Significance: Youtiao is a popular breakfast item and street food in China. It is often enjoyed with soy milk or congee.
- Variations: Youtiao has different names in various regions, such as “you char kway” in Singapore and Malaysia. It is also known as “cruller” in some English-speaking regions.
Region of China:
- Youtiao is widely consumed throughout China and is an integral part of breakfast culture in many regions.
Chinese Desserts – Youtiao Ingredients
- 2 cups all-purpose flour
- 1 teaspoon baking powder
- 1/2 teaspoon baking soda
- 1/2 teaspoon salt
- 1 tablespoon sugar
- 3/4 cup warm water
- 1 tablespoon vegetable oil
- Oil for frying
Chinese Desserts – Youtiao Recipe
The Dough
- In a large mixing bowl, combine the all-purpose flour, baking powder, baking soda, salt, and sugar.
- Gradually add warm water and vegetable oil to the dry ingredients.
- Mix until a soft dough forms.
- Knead the dough on a floured surface for about 5-7 minutes until it becomes smooth.
- Place the dough back in the bowl, cover it with a damp cloth, and let it rest for 1-2 hours.
Shaping Youtiao
- Roll out the rested dough into a thin rectangle on a floured surface.
- Cut the dough into strips, approximately 1 inch wide and 8-10 inches long.
Frying Youtiao
- Heat oil in a deep fryer or a deep, heavy-bottomed pan to 375°F (190°C).
- Gently stretch each strip of dough to elongate it, then carefully place it into the hot oil.
- Fry until golden brown on both sides, turning as needed for even cooking.
- Remove the youtiao with a slotted spoon and place them on a paper towel to absorb excess oil.
Serving
- Youtiao is best enjoyed fresh and warm.
- Serve with soy milk, rice congee, or as a side dish with savory accompaniments.
Tips
- Be cautious when working with hot oil.
- Experiment with the thickness and length of the dough strips to achieve the desired texture.
Now you have a classic recipe for Youtiao, Chinese doughnut sticks. These crispy and airy treats are a delightful addition to your breakfast or snack time. Enjoy them with your favorite dipping sauce or traditional pairings!
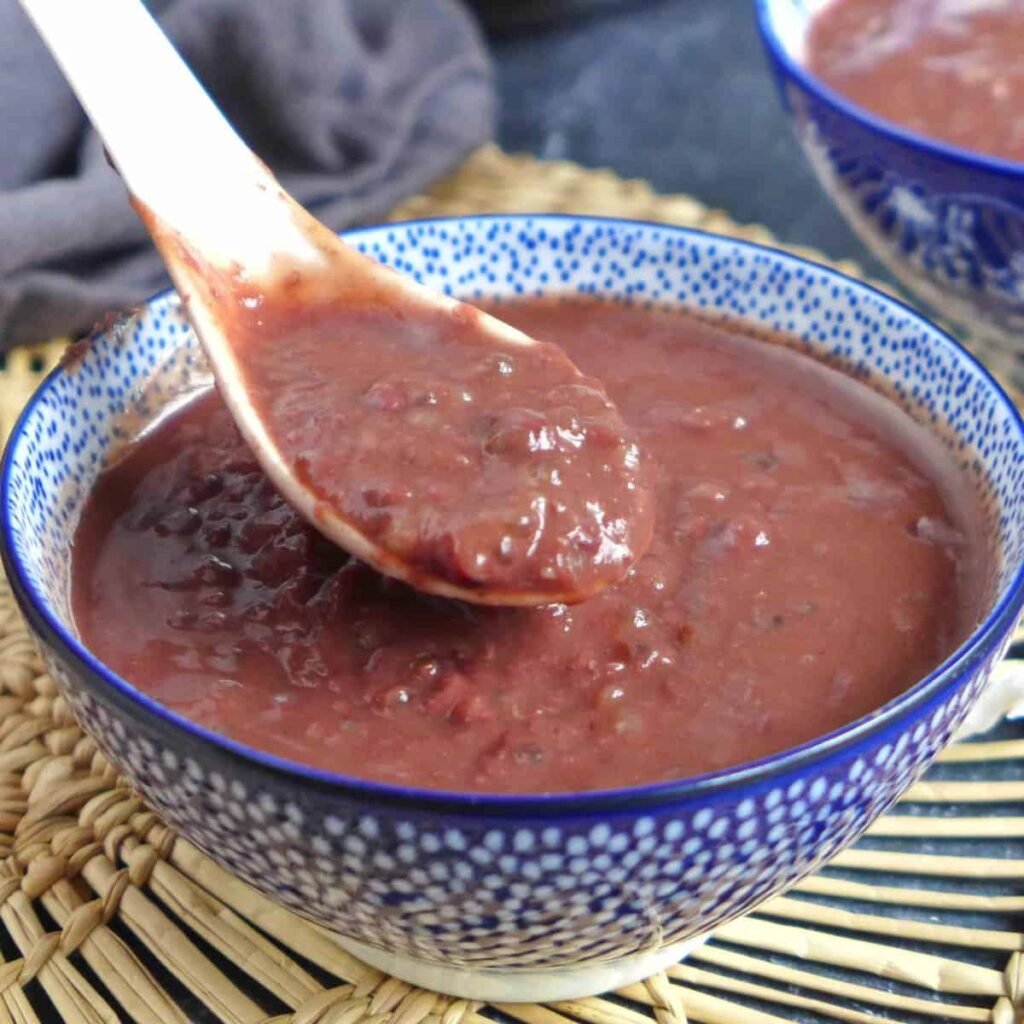
Chinese Desserts – Red Bean Soup

History and Background
- Origin: Red bean soup, known as “Hong Dou Tang” in Mandarin, is a traditional Chinese dessert with a long history.
- Cultural Significance: Red bean soup is enjoyed across China and is often associated with celebratory occasions and festivals. It’s also consumed as a comfort food.
- Ingredients Variation: While the basic recipe involves red beans, sugar, and water, variations may include additional ingredients like glutinous rice balls (tangyuan) or sago pearls.
Region of China:
- Red bean soup is a popular dessert throughout China, and regional variations may exist. It is commonly consumed in both northern and southern regions.
Chinese Desserts – Red Bean Soup Ingredients
- 1 cup dried red adzuki beans
- 8 cups water
- 1/2 cup rock sugar or granulated sugar (adjust to taste)
- Optional: pandan leaves or orange peel for flavor (traditional variations)
- Optional toppings: glutinous rice balls (tangyuan), sago pearls, or lotus seeds
Chinese Desserts – Red Bean Soup Recipe
Preparing the Red Beans
- Rinse the red beans under cold water to remove any impurities.
- Soak the red beans in water for at least 4 hours or overnight.
Cooking the Red Bean Soup
- Drain the soaked red beans and place them in a large pot with 8 cups of water.
- Bring the water to a boil and then reduce the heat to simmer.
- Add pandan leaves or orange peel if using for extra flavor.
- Cook the red beans for 1-1.5 hours or until they are soft and easily mashed.
Sweetening the Soup
- Once the red beans are cooked, add rock sugar or granulated sugar to the pot.
- Stir until the sugar is dissolved.
- Taste and adjust the sweetness according to your preference.
Optional Toppings
- If you want to add glutinous rice balls (tangyuan), prepare them according to package instructions and add them to the soup.
- Alternatively, you can cook sago pearls separately and add them to the red bean soup.
- Lotus seeds are another traditional topping that can be added at this stage.
Serving
- Remove pandan leaves or orange peel if used.
- Ladle the red bean soup into bowls and serve it hot.
Tips
- Adjust the thickness of the soup by adding more water if needed.
- Feel free to experiment with additional toppings or flavors based on personal preferences.
Now you have a delicious and comforting recipe for Chinese Red Bean Soup. Enjoy this sweet and nutritious dessert, especially during colder seasons or festive occasions!
Lotus Seed Paste

History and Background
- Origin: Lotus seed paste is a traditional Chinese sweet filling made from the seeds of the lotus plant.
- Cultural Significance: Lotus seed paste is a key ingredient in many Chinese desserts, especially in mooncakes, where it symbolizes purity and perfection.
- Usage in Festivals: Mooncakes filled with lotus seed paste are commonly consumed during the Mid-Autumn Festival, symbolizing family reunion and harmony.
Region of China:
- Lotus seed paste is used in Chinese cuisine across various regions. It is particularly associated with the preparation of mooncakes, a traditional delicacy enjoyed during the Mid-Autumn Festival.
Chinese Desserts – Lotus Seed Paste Ingredients
- 1 cup dried lotus seeds
- 1 cup sugar
- 1/2 cup vegetable oil or lard
- Water for soaking and boiling
- Optional: a pinch of salt
Chinese Desserts – Lotus Seed Paste Recipe
Preparing Lotus Seeds
- Rinse the dried lotus seeds under cold water to remove any impurities.
- Soak the lotus seeds in water for at least 2 hours or overnight.
- Drain the soaked lotus seeds and transfer them to a pot.
- Add enough water to cover the lotus seeds and a pinch of salt.
- Boil the lotus seeds for about 30-40 minutes or until they are soft and can be easily mashed.
Making Lotus Seed Paste
- Drain the boiled lotus seeds and let them cool.
- Remove the green germ from the center of each seed, as it can be bitter.
- In a food processor, blend the lotus seeds into a smooth paste. Add a bit of water if needed.
Cooking the Paste
- Heat vegetable oil or lard in a pan over medium heat.
- Add the lotus seed paste and sugar to the pan.
- Stir continuously to prevent burning and cook until the paste thickens. This may take around 15-20 minutes.
Adjusting Sweetness
- Taste the lotus seed paste and adjust the sweetness by adding more sugar if needed.
- Continue cooking until the paste reaches a smooth consistency.
Cooling and Storing
- Allow the lotus seed paste to cool completely before using it as a filling.
- Store the lotus seed paste in an airtight container in the refrigerator.
Tips
- If you prefer a smoother texture, you can strain the lotus seed paste after blending to remove any remaining solids.
- Adjust the sugar content to suit your taste preferences.
Now you have a versatile lotus seed paste that can be used as a filling for various Chinese desserts, particularly mooncakes. Enjoy the rich, nutty flavor of lotus seeds in your homemade treats!
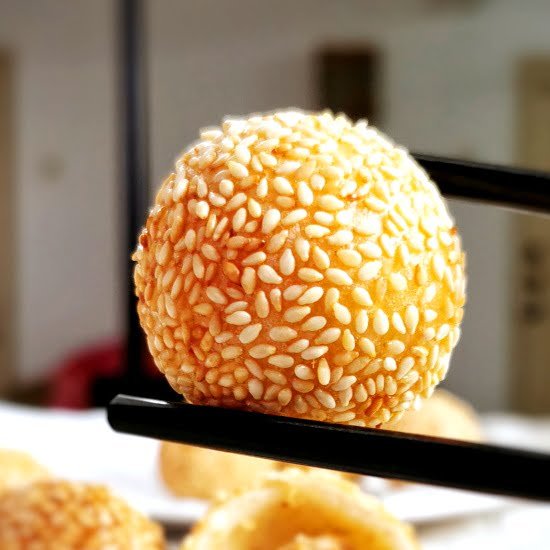
Chinese Desserts – Sesame Balls-Jian Dui

History and Background
- Origin: Jian Dui, also known as Sesame Balls or Fried Glutinous Rice Balls, is a traditional Chinese dessert with a long history.
- Region: The recipe has roots in Chinese cuisine and is enjoyed across various regions.
Chinese Desserts – Sesame Balls-Jian Dui Ingredients:
For the Sesame Balls:
- 1 cup glutinous rice flour
- 1/4 cup water
- 1/4 cup sugar
- 1 cup sweet red bean paste (or other fillings of choice)
- Vegetable oil for deep frying
- White sesame seeds for coating
For the Sweet Red Bean Paste Filling:
- 1 cup adzuki beans
- 1 cup sugar
- Water for boiling
Chinese Desserts – Sesame Balls-Jian Dui Recipe
1. Prepare the Sweet Red Bean Paste (if not using pre-made):
- Rinse the adzuki beans and soak them in water overnight.
- Boil the beans in a pot with enough water until they become soft and the skins start to split.
- Drain the beans and blend or mash them. Cook the mashed beans with sugar in a pan until a thick paste forms. Allow it to cool.
2. Make the Glutinous Rice Dough:
- In a mixing bowl, combine glutinous rice flour, sugar, and water. Mix well until it forms a smooth, elastic dough.
3. Forming the Sesame Balls:
- Take a small portion of the dough and flatten it in your palm.
- Place a teaspoon of sweet red bean paste in the center and wrap the dough around it, forming a smooth ball.
4. Coat with Sesame Seeds:
- Roll the balls in white sesame seeds, ensuring they stick to the surface of the dough.
5. Fry the Sesame Balls:
- Heat vegetable oil in a deep pan or wok to 350°F (175°C).
- Gently place the sesame balls into the hot oil and fry until they turn golden brown, turning them for even cooking.
6. Drain and Cool:
- Remove the sesame balls from the oil and place them on paper towels to drain excess oil.
- Allow them to cool for a few minutes before serving.
7. Serve and Enjoy:
- Serve the sesame balls warm. The outer layer should be crispy, while the inside is soft and chewy with a sweet red bean filling.
Notes:
- Experiment with different fillings like lotus seed paste or black sesame paste for variety.
- Adjust sugar quantities based on personal preference.
- It’s important to maintain a consistent oil temperature while frying for the best results.
Enjoy these delightful Sesame Balls as a sweet treat with a cup of Chinese tea or as a dessert for special occasions!
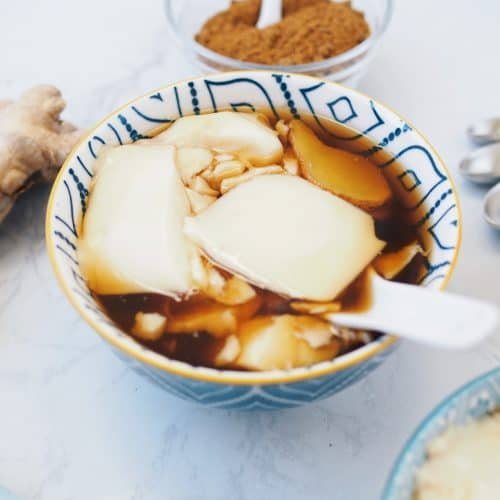
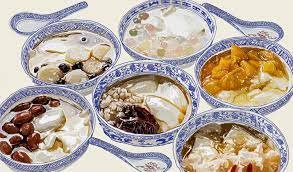
Chinese Desserts -Douhua – Tofu Pudding

History and Background:
- Origin: Douhua, also known as Tofu Pudding, is a traditional Chinese dessert that dates back over 2,000 years.
- Region: It originated in China and has variations in different Chinese cuisines, including Cantonese, Hakka, and Taiwanese.
Chinese Desserts -Douhua Ingredients
For the Douhua:
- 1 cup soybeans
- Water for soaking and blending
- 1 tablespoon gypsum (calcium sulfate) or food-grade Epsom salt, dissolved in water
- 1/4 cup sugar (adjust to taste)
- 1 teaspoon vanilla extract (optional)
- Water for steaming
Topping (Optional):
- Ginger syrup (made by boiling ginger and sugar)
- Sweet red bean paste
- Grass jelly
- Crushed peanuts
Chinese Desserts -Douhua Recipe:
1. Prepare the Soy Milk:
- Rinse the soybeans and soak them in water overnight.
- Blend the soaked soybeans with water until smooth. Strain the mixture using cheesecloth or a fine sieve to extract soy milk.
2. Coagulate the Soy Milk:
- In a pot, heat the soy milk over medium heat. Just before it comes to a boil, add the dissolved gypsum or Epsom salt.
- Stir gently and let it sit undisturbed for about 10-15 minutes until curds form.
3. Cut and Serve Douhua:
- Once the tofu coagulates, cut it into small, bite-sized cubes using a sharp knife or a special tofu cutting tool.
- Carefully transfer the tofu cubes into serving bowls.
4. Sweeten the Douhua:
- Sprinkle sugar over the tofu cubes. Adjust the sweetness according to your taste.
- Add a touch of vanilla extract for flavor if desired.
5. Steam the Douhua:
- Place the bowls of tofu in a steamer and steam over medium heat for about 10-15 minutes until the tofu is heated through.
6. Prepare Toppings (Optional):
- While the tofu is steaming, prepare optional toppings like ginger syrup, sweet red bean paste, grass jelly, or crushed peanuts.
7. Serve and Enjoy:
- Once steamed, remove the tofu bowls from the steamer.
- Add desired toppings and serve the Douhua warm.
Notes:
- Douhua is versatile and can be enjoyed warm or chilled, depending on personal preference.
- Experiment with various toppings to create different flavor combinations.
- Adjust the thickness of the soy milk to achieve the desired texture of the Douhua.
Enjoy this silky and delicate Tofu Pudding as a comforting dessert or a light snack in the rich tapestry of Chinese culinary traditions!
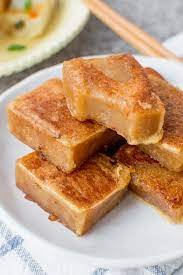
Chinese Desserts – Nian Gao Cake

History and Background
- Origins: Nian Gao Cake, also known as Chinese New Year Cake or Sticky Rice Cake, has deep roots in Chinese culture and is a traditional dish consumed during the Lunar New Year celebrations.
- Symbolism: The cake symbolizes prosperity, growth, and the promise of a better year ahead. The word “Nian” means “year,” and “Gao” sounds like “tall” or “high,” representing the wish for growth, progress, and the promise of a better year.
Region of Origin:
- Widespread Tradition: Nian Gao is a popular Chinese New Year dish enjoyed across various regions of China and among Chinese communities worldwide.
- Diverse Variations: Different regions may have their unique variations, with some incorporating ingredients like red dates, coconut, or nuts for added flavor and texture.
Chinese Desserts – Nian Gao Cake Ingredients
- 2 cups glutinous rice flour
- 1 1/4 cups water
- 1 1/2 cups brown sugar or granulated sugar
- 1 cup water (for making the sugar syrup)
- 1 tablespoon vegetable oil (for greasing the pan)
- Optional: sesame seeds, chopped nuts, or grated coconut for coating
Chinese Desserts – Nian Gao Cake Recipe
Prepare the Batter:
- In a mixing bowl, combine the glutinous rice flour and 1 1/4 cups of water.
- Stir the mixture until it forms a smooth batter with a consistency similar to pancake batter.
- Pour the batter into a heatproof dish or cake pan greased with vegetable oil.
- Steam the batter over high heat for about 20-30 minutes or until it becomes translucent and firm.
Make the Sugar Syrup:
- In a separate saucepan, dissolve the brown sugar in 1 cup of water over medium heat, stirring until you have a smooth syrup.
Combine and Steam
- Pour the sugar syrup over the steamed glutinous rice cake, ensuring it is evenly coated.
- Continue to steam the cake with the syrup for an additional 15-20 minutes until it thickens.
Cool and Slice
- Allow the Nian Gao to cool completely in the pan before removing it.
- Optionally, coat the sides with sesame seeds, chopped nuts, or grated coconut for added texture and flavor.
- Once cooled and set, slice the Nian Gao into desired shapes.
- Nian Gao can be enjoyed as is or pan-fried for a delightful crispy exterior. To pan-fry, slice the cake into pieces and cook until both sides turn golden brown.
Enjoy the Tradition
- Serve the Nian Gao during Chinese New Year celebrations or as a delightful treat throughout the year.
Nian Gao Cake is a symbol of good luck and prosperity, making it a cherished part of Chinese New Year traditions. This recipe captures the essence of a time-honored dessert enjoyed by families to usher in a prosperous new year.
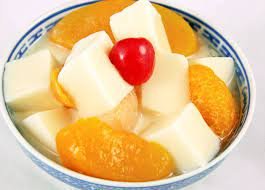
Chinese Desserts – Almond Jelly

History and Background
- Origins: Almond Jelly, known as “Xing Ren Dou Fu Hua” in Mandarin, has roots in traditional Chinese cuisine and has been enjoyed for centuries.
- Cultural Significance: Almond Jelly is valued for its delicate texture, refreshing taste, and association with positive health benefits, particularly for the skin.
Region of Origin:
- Widespread Appeal: Almond Jelly is a popular dessert enjoyed throughout China and has variations in different regions.
- Influence in Cantonese Cuisine: The dessert has strong ties to Cantonese cuisine, where it is often served in restaurants and households as a refreshing way to conclude a meal.
Chinese Desserts – Almond Jelly Ingredients
- 1/2 cup raw almonds
- 3 cups water (for almond milk)
- 1/4 cup sugar (adjust to taste)
- 1 cup milk (or almond milk for a richer flavor)
- 2 teaspoons agar-agar powder or gelatin
- 1/4 cup water (for dissolving agar-agar or gelatin)
- 1/2 teaspoon almond extract (optional)
- Fresh fruits or canned fruit cocktail for garnish (optional)
Chinese Desserts – Almond Jelly Recipe
Prepare Almond Milk
- Soak the raw almonds in water for a few hours or overnight.
- Blend the soaked almonds with 3 cups of water until smooth.
- Strain the almond mixture through cheesecloth or a fine mesh sieve to extract almond milk. Set aside.
Dissolve Agar-Agar or Gelatin
- In a small bowl, dissolve agar-agar powder or gelatin in 1/4 cup of water. Let it sit for a few minutes.
Heat Almond Milk
- In a saucepan, heat the almond milk over medium heat.
- Add sugar and stir until dissolved.
Combine Almond Milk and Agar-Agar/Gelatin
- Pour the dissolved agar-agar or gelatin into the warm almond milk, stirring continuously to ensure even distribution.
- Bring the almond milk mixture to a gentle boil, stirring constantly. Ensure that the agar-agar or gelatin is completely dissolved.
Add Milk and Almond Extract
- Add regular milk (or more almond milk for a richer flavor) to the mixture.
- Optionally, add almond extract for enhanced almond flavor. Stir well.
Cool and Set
- Allow the mixture to cool slightly before pouring it into individual serving dishes or a larger mold.
- Refrigerate the almond jelly until it is fully set. This may take a few hours.
Serve
- Once set, serve the almond jelly chilled.
- Optionally, garnish with fresh fruits or canned fruit cocktail for added texture and sweetness.
Enjoy the Refreshing Delight:
- Almond Jelly is best enjoyed as a cool and refreshing dessert, perfect for any occasion or as a sweet conclusion to a Chinese meal.
Almond Jelly, with its smooth texture and subtly sweet almond flavor, encapsulates the essence of Chinese dessert traditions. This recipe allows you to create this delightful treat, blending tradition with a touch of modern flair.
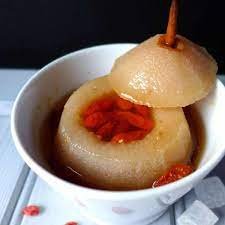
Chinese Dessert – Steamed Asian Pears with Rock Sugar (冰糖雪梨)

History and Background
Steamed Asian Pears with Rock Sugar is a classic Chinese dessert that traces its origins to traditional Chinese medicine. This soothing and naturally sweet dish is believed to have originated in the southern regions of China, where Asian pears are abundant.
Chinese medicine attributes healing properties to Asian pears, considering them beneficial for respiratory health and soothing throat discomfort. The inclusion of rock sugar enhances both the flavor and medicinal properties of this delicacy, creating a harmonious blend of taste and wellness.
Region of Origin
The recipe for Steamed Asian Pears with Rock Sugar is prominent in various regions of China, but it particularly thrives in the southern provinces where Asian pears flourish. The warm and humid climate in these areas contributes to the cultivation of high-quality Asian pears, making them a staple ingredient in regional cuisines.
Ingredients
- 4 Asian pears, peeled and cored
- 1/4 cup rock sugar (adjust to taste)
- 1 tablespoon honey
- 1 teaspoon fresh ginger, finely grated
- 1 tablespoon goji berries (optional)
- 1 tablespoon wolfberries (optional)
- Water for steaming
Chinese Dessert – Steamed Asian Pears with Rock Sugar Recipe
1. Prepare Asian Pears:
- Peel and core the Asian pears, ensuring they are evenly shaped to facilitate even steaming.
2. Create Sugar Mixture:
- In a small bowl, combine rock sugar, honey, and freshly grated ginger. Mix well to form a sweet and aromatic syrup.
3. Stuff Pears with Sugar Mixture:
- Gently stuff each cored Asian pear with the sugar mixture, ensuring the mixture reaches the center of the pear.
4. Add Optional Ingredients:
- If desired, sprinkle goji berries and wolfberries over the stuffed pears. These ingredients add both flavor and nutritional value.
5. Prepare Steaming Setup:
- Place the stuffed Asian pears in a heatproof dish suitable for steaming.
- Add water to the steaming apparatus, ensuring there is enough to generate steam throughout the steaming process.
6. Steam the Pears:
- Steam the Asian pears over medium heat for approximately 20-25 minutes or until the pears are tender but not overly mushy.
7. Serve Warm:
- Once steamed, carefully remove the Asian pears from the heat.
- Serve them warm, allowing the rock sugar syrup to coat the pears, creating a delectable and comforting dessert.
8. Enjoy the Healthful Delight:
- Steamed Asian Pears with Rock Sugar is best enjoyed as a warm and soothing dessert. The combination of tender Asian pears and the sweet, ginger-infused syrup makes for a delightful treat that embodies both taste and traditional Chinese wellness principles.
Chinese Desserts – Soy Milk Pudding

History:
Soy Milk Pudding, known as “Douhua” in Mandarin, boasts a rich history deeply embedded in Chinese culinary traditions. Originating over a thousand years ago during the Tang Dynasty, this dessert gained popularity due to its versatility and adaptability to various flavors.
Originally a savory dish, Douhua gradually evolved into a sweetened dessert enjoyed across different regions of China.
Background:
Douhua holds a special place in Chinese cuisine as a beloved street food and dessert. Its preparation involves coagulating soy milk into a silky-smooth pudding, offering a delightful contrast between its soft texture and the often accompanying sweet or savory toppings.
This humble yet revered dessert embodies the essence of Chinese comfort food.
Region of Origin:
While Douhua is appreciated throughout China, it has strong ties to regions like Guangdong and Taiwan. Each region incorporates its own unique variations, with Guangdong emphasizing the delicate texture of the pudding, while Taiwanese renditions often include a diverse array of toppings.
Chinese Desserts – Soy Milk Pudding Ingredients:
- 2 cups unsweetened soy milk
- 1 1/2 tablespoons gypsum powder or food-grade calcium sulfate
- 2 tablespoons water
- 1/4 cup granulated sugar (adjust to taste)
- Toppings: sweet red bean paste, sweet ginger syrup, cooked peanuts, or tapioca pearls (optional)
Chinese Desserts – Soy Milk Pudding Recipe:
1. Prepare Gypsum Mixture:
- In a small bowl, dissolve gypsum powder in 2 tablespoons of water. Stir well to create a smooth mixture.
2. Heat Soy Milk:
- Heat the unsweetened soy milk in a saucepan until it’s warm but not boiling.
3. Combine Gypsum Mixture and Soy Milk:
- Slowly pour the gypsum mixture into the warm soy milk, stirring gently and continuously.
4. Let it Set:
- Allow the soy milk mixture to sit undisturbed for 15-20 minutes to coagulate and set.
5. Cut into Cubes:
- Once set, the soy milk will form a soft pudding. Cut it into bite-sized cubes using a knife or spoon.
6. Sweeten the Pudding:
- Sprinkle granulated sugar over the soy milk cubes to add sweetness. Adjust the amount to suit your taste preferences.
7. Serve with Toppings:
- Spoon the sweetened soy milk pudding into bowls.
- Optionally, top it with sweet red bean paste, sweet ginger syrup, cooked peanuts, or tapioca pearls for added flavor and texture.
8. Enjoy the Delicate Dessert:
- Soy Milk Pudding is best enjoyed fresh, either warm or chilled. Its velvety texture and subtle sweetness make it a delightful Chinese dessert that captures the essence of time-honored culinary traditions
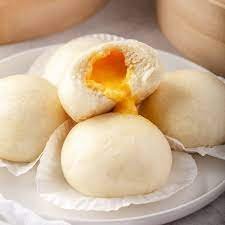
Chinese Desserts – Liu Sha Bao (Salted Duck Eggs Custard Buns 流沙包)

History:
Liu Sha Bao, commonly known as the Molten Salted Egg Yolk Bun, is a delectable Chinese dessert renowned for its rich history and indulgent flavors. Originating in Guangzhou, China, Liu Sha Bao has roots in the Cantonese dim sum tradition. Its creation is attributed to the innovative minds of dim sum chefs who sought to introduce a delightful surprise of molten salted egg yolk filling encased in a soft and fluffy bun.
Background:
This dessert gained immense popularity for its unique combination of textures and flavors. The golden lava-like filling, derived from salted duck egg yolks, creates a luscious and savory contrast to the sweet, pillowy exterior of the bun. Liu Sha Bao is not only a treat for the taste buds but also a testament to the culinary craftsmanship present in Cantonese dessert-making.
Region of Origin:
Liu Sha Bao originated in Guangzhou, a city celebrated for its vibrant culinary scene. As a staple in dim sum restaurants across Guangdong province, this dessert has transcended regional borders, becoming a beloved item on menus worldwide.
Chinese Desserts – Liu Sha Bao Ingredients:
- For the Bun:
- 2 1/2 cups all-purpose flour
- 3 tablespoons sugar
- 1 tablespoon milk powder
- 1 tablespoon vegetable oil
- 1 teaspoon instant yeast
- 1 cup warm water
- For the Filling:
- 4 salted duck egg yolks
- 1/4 cup unsalted butter
- 1/4 cup condensed milk
- 2 tablespoons powdered sugar
- 1 tablespoon custard powder
Chinese Desserts – Liu Sha Bao Recipe:
1. Prepare the Bun Dough:
- In a mixing bowl, combine flour, sugar, milk powder, and instant yeast.
- Gradually add warm water and vegetable oil to form a soft dough. Knead until smooth.
2. Let the Dough Rise:
- Cover the dough and let it rise in a warm place for about 1-2 hours or until it doubles in size.
3. Prepare the Filling:
- Steam salted duck egg yolks for about 15 minutes, then mash them into a fine crumble.
- In a separate bowl, mix butter, condensed milk, powdered sugar, and custard powder. Add the mashed egg yolks and combine well.
4. Divide and Shape the Dough:
- Punch down the risen dough and divide it into equal portions.
- Flatten each portion into a disc and spoon a generous amount of the filling into the center.
5. Seal and Shape the Buns:
- Gather the edges of the dough disc to encase the filling, sealing it well.
- Place each bun on a parchment paper square, seam side down.
6. Let the Buns Rise Again:
- Cover the buns and let them rise for an additional 30 minutes.
7. Steam the Buns:
- Steam the buns in a steamer over high heat for 12-15 minutes, or until they are puffed and cooked through.
8. Serve Warm:
- Liu Sha Bao is best enjoyed warm, allowing the molten salted egg yolk filling to flow out when bitten into.
9. Savor the Delight:
- Liu Sha Bao offers a sumptuous experience with its soft bun exterior and oozing salted egg yolk filling. Embrace the culinary heritage of Guangzhou with this iconic Cantonese dessert.
Chinese Desserts – Snow Fungus Soup with Pears (Chinese Dessert Soup 冰糖银耳炖雪梨)

History:
Snow Fungus Soup with Pears, a cherished Chinese dessert soup, has a history deeply rooted in traditional Chinese medicine and culinary heritage. Originating from ancient Chinese practices, this nourishing soup was believed to have therapeutic properties, particularly benefiting respiratory health and skin complexion. Over centuries, it evolved into a delectable dessert, blending medicinal wisdom with culinary delight.
Background:
This dessert soup reflects the Chinese philosophy of harmonizing flavors and promoting well-being through natural ingredients. Snow fungus, prized for its health benefits, is paired with sweet pears to create a delicate and soothing dessert that encapsulates the essence of balance and nourishment.
Region of Origin:
The origins of Snow Fungus Soup with Pears can be traced to various regions in China, where it has become a popular part of dessert culture. With its roots in traditional Chinese medicine, this dessert soup transcends regional boundaries and is enjoyed throughout the country.
Chinese Desserts – Snow Fungus Soup with Pears 冰糖银耳炖雪梨 Ingredients:
- 1 cup dried snow fungus
- 2 medium-sized Chinese or Asian pears, peeled, cored, and diced
- 8-10 red dates (jujubes), pitted
- 1/4 cup goji berries
- 1/4 cup rock sugar (adjust to taste)
- 8 cups water
Chinese Desserts – Snow Fungus Soup with Pears 冰糖银耳炖雪梨 Recipe:
1. Prepare Snow Fungus:
- Soak the dried snow fungus in warm water until it expands and becomes soft. Trim off the tough yellow parts and cut into smaller pieces.
2. Prepare Ingredients:
- Peel, core, and dice the Chinese or Asian pears.
- Pit and rinse the red dates (jujubes).
- Rinse the goji berries.
3. Combine Ingredients in Pot:
- In a large pot, combine the soaked snow fungus, diced pears, pitted red dates, goji berries, and rock sugar.
4. Add Water:
- Pour 8 cups of water into the pot, ensuring all ingredients are submerged.
5. Simmer the Soup:
- Bring the mixture to a boil over high heat, then reduce the heat to low and simmer for approximately 1-1.5 hours, or until the ingredients are tender and flavors are infused.
6. Adjust Sweetness:
- Taste the soup and adjust sweetness by adding more rock sugar if desired. Stir until the sugar is fully dissolved.
7. Serve Warm:
- Ladle the Snow Fungus Soup with Pears into bowls and serve it warm as a nourishing and soothing Chinese dessert soup.
8. Enjoy the Nutrient-Rich Delight:
- Snow Fungus Soup with Pears not only delights the taste buds but also provides a dose of healthful benefits. Savor the subtle sweetness and delicate textures of this traditional Chinese dessert soup, celebrating the union of flavor and well-being.
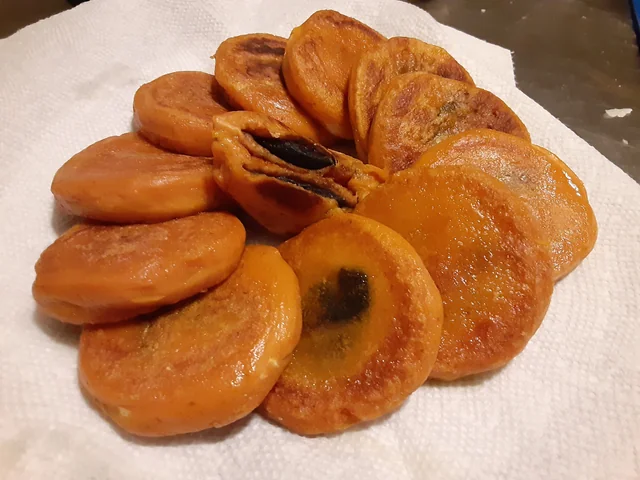
Chinese Desserts – Chinese Pumpkin Cakes (南瓜饼 Nan Gua Bing)

History:
Chinese Pumpkin Cakes, known as “Nan Gua Bing” in Mandarin, have a rich history rooted in traditional Chinese cuisine. Originating from the southern regions of China, where pumpkins thrive, these cakes have been a staple in Chinese households for generations. Originally crafted as a festive treat for special occasions and celebrations, Chinese Pumpkin Cakes have become a beloved dessert enjoyed year-round.
Background:
Nan Gua Bing reflects the Chinese culinary emphasis on seasonal and locally sourced ingredients. Pumpkins, with their natural sweetness and vibrant color, are a key component, making these cakes a delightful blend of flavor and cultural significance. Often enjoyed during the Mid-Autumn Festival and other festivities, these cakes symbolize prosperity and good fortune.
Region of Origin:
Chinese Pumpkin Cakes are particularly associated with the southern provinces of China, where pumpkins are a prominent crop. The recipe variations may differ slightly across regions, but the core concept of combining pumpkin with glutinous rice flour remains a consistent thread in the southern culinary landscape.
Chinese Desserts – Chinese Pumpkin Cakes Ingredients
- 2 cups pumpkin puree (from cooked and mashed pumpkin)
- 1 1/2 cups glutinous rice flour
- 1/2 cup sugar (adjust to taste)
- 1/4 cup water (adjust as needed for consistency)
- Sesame seeds for coating
- Oil for frying
Chinese Desserts – Chinese Pumpkin Cakes Recipe
1. Prepare Pumpkin Puree:
- Steam or boil pumpkin until soft, then mash or blend to create a smooth puree.
2. Mix Ingredients:
- In a large bowl, combine the pumpkin puree, glutinous rice flour, and sugar. Mix well.
3. Adjust Consistency:
- Gradually add water to the mixture, adjusting the consistency to a thick batter that can be easily spooned.
4. Form Pumpkin Cakes:
- Spoon the batter onto a flat surface, shaping it into round cakes.
5. Coat with Sesame Seeds:
- Press each cake into sesame seeds, ensuring they coat both sides.
6. Heat Oil:
- In a pan, heat oil for frying over medium heat.
7. Fry Pumpkin Cakes:
- Carefully place the coated pumpkin cakes into the hot oil and fry until they turn golden brown on both sides.
8. Drain and Cool:
- Remove the fried pumpkin cakes and place them on paper towels to drain excess oil. Allow them to cool.
9. Serve and Enjoy:
- Chinese Pumpkin Cakes can be served warm or at room temperature. Enjoy the crispy exterior and soft, flavorful interior of these delightful treats.
10. Celebrate with Nan Gua Bing:
- Embrace the flavors and traditions of southern China by indulging in Chinese Pumpkin Cakes. Whether for festive occasions or everyday enjoyment, these cakes bring a taste of cultural heritage to the dessert table.
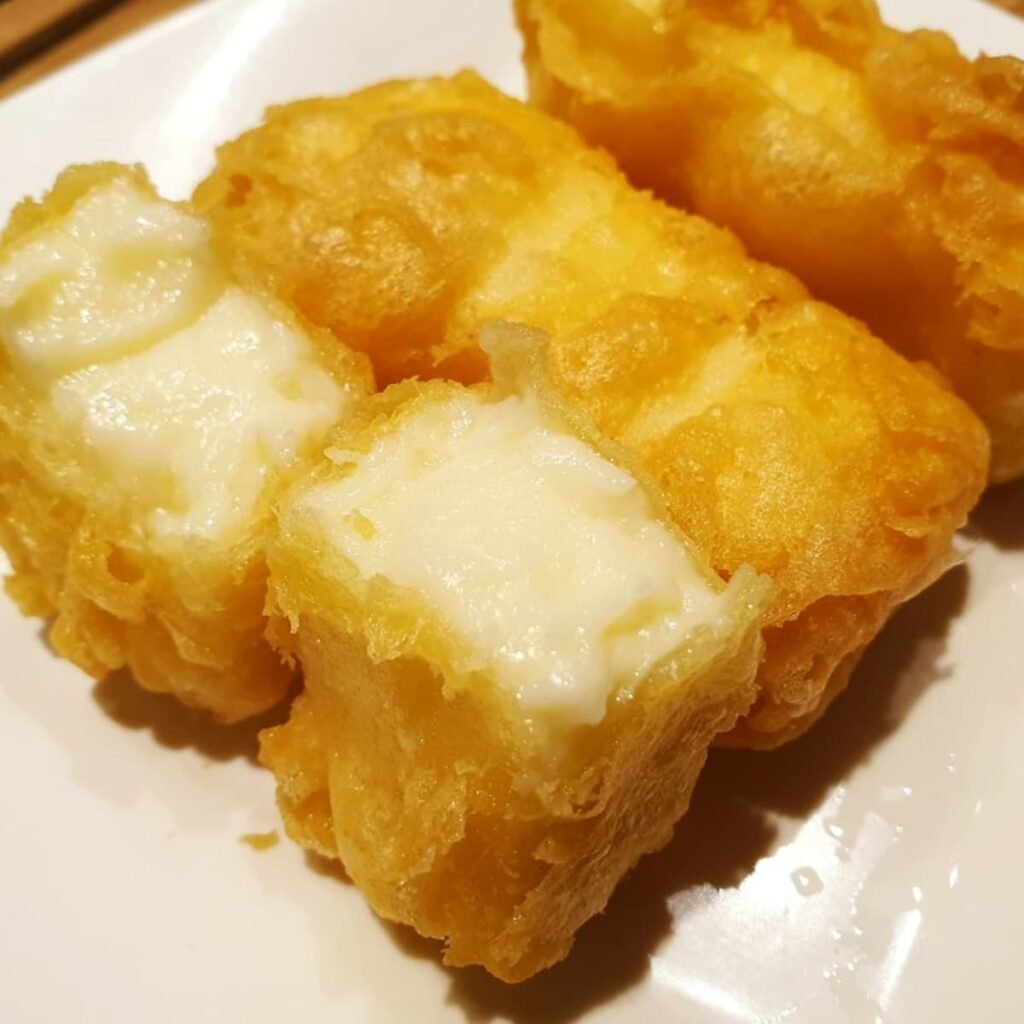
Chinese Desserts – Fried Milk

History:
Fried Milk, a decadent Chinese dessert, holds a history intertwined with the rich tapestry of Cantonese cuisine. Originating in Guangdong province, this sweet indulgence has roots in the traditional preparation of milk-based sweets. Over time, the culinary artisans of Canton transformed simple ingredients like milk into a delightful treat by incorporating frying techniques. Fried Milk has since become a beloved dessert, celebrated for its crispy exterior that gives way to a creamy and luscious interior.
Background:
In Cantonese gastronomy, Fried Milk showcases the delicate balance between textures and flavors. The juxtaposition of the crunchy coating and the smooth, custard-like filling epitomizes the mastery of Cantonese dessert-making. Often enjoyed during festive occasions and family gatherings, Fried Milk embodies the essence of both indulgence and culinary finesse.
Region of Origin:
Fried Milk originates from Guangdong province, the culinary heart of Cantonese cuisine. As one of the four great traditions of Chinese cuisine, Cantonese dishes are renowned for their intricate flavors and emphasis on fresh, high-quality ingredients. Fried Milk, with its unique preparation method, reflects the innovation and creativity deeply ingrained in Cantonese culinary culture.
Chinese Desserts – Fried Milk Ingredients:
- 2 cups whole milk
- 1/2 cup granulated sugar
- 1/4 cup cornstarch
- 1/4 cup all-purpose flour
- 2 large eggs
- 1 teaspoon vanilla extract
- Breadcrumbs for coating
- Vegetable oil for frying
- Powdered sugar for dusting (optional)
Chinese Desserts – Fried Milk Recipe:
1. Prepare Milk Mixture:
- In a saucepan, heat milk and sugar over medium heat until it simmers. Remove from heat and let it cool slightly.
2. Mix Cornstarch and Flour:
- In a bowl, mix cornstarch and flour together.
3. Add Dry Ingredients to Milk:
- Gradually add the cornstarch and flour mixture to the warm milk, stirring continuously to avoid lumps.
4. Beat Eggs and Add Vanilla:
- In a separate bowl, beat the eggs and add vanilla extract.
5. Combine Egg Mixture with Milk Mixture:
- Gradually add the beaten eggs and vanilla extract to the milk mixture, stirring constantly until well combined.
6. Cook the Mixture:
- Return the mixture to the heat and cook over low heat, stirring continuously until it thickens to a custard-like consistency.
7. Chill the Mixture:
- Transfer the cooked mixture to a dish, cover with plastic wrap, and refrigerate until it solidifies.
8. Shape into Squares:
- Once chilled, cut the solidified milk mixture into squares.
9. Coat with Breadcrumbs:
- Roll each milk square in breadcrumbs until evenly coated.
10. Fry the Milk Squares:
- Heat vegetable oil in a pan over medium heat. Fry the coated milk squares until they turn golden brown on all sides.
11. Drain and Dust with Powdered Sugar:
- Remove the fried milk squares and place them on paper towels to drain excess oil. Optionally, dust with powdered sugar.
12. Serve Warm:
- Fried Milk is best enjoyed warm. The contrast of the crispy exterior and creamy interior makes for a delightful dessert.
13. Savor the Crispy Creaminess:
- Experience the delectable harmony of textures with Fried Milk, a classic Cantonese dessert that captures the essence of culinary craftsmanship.
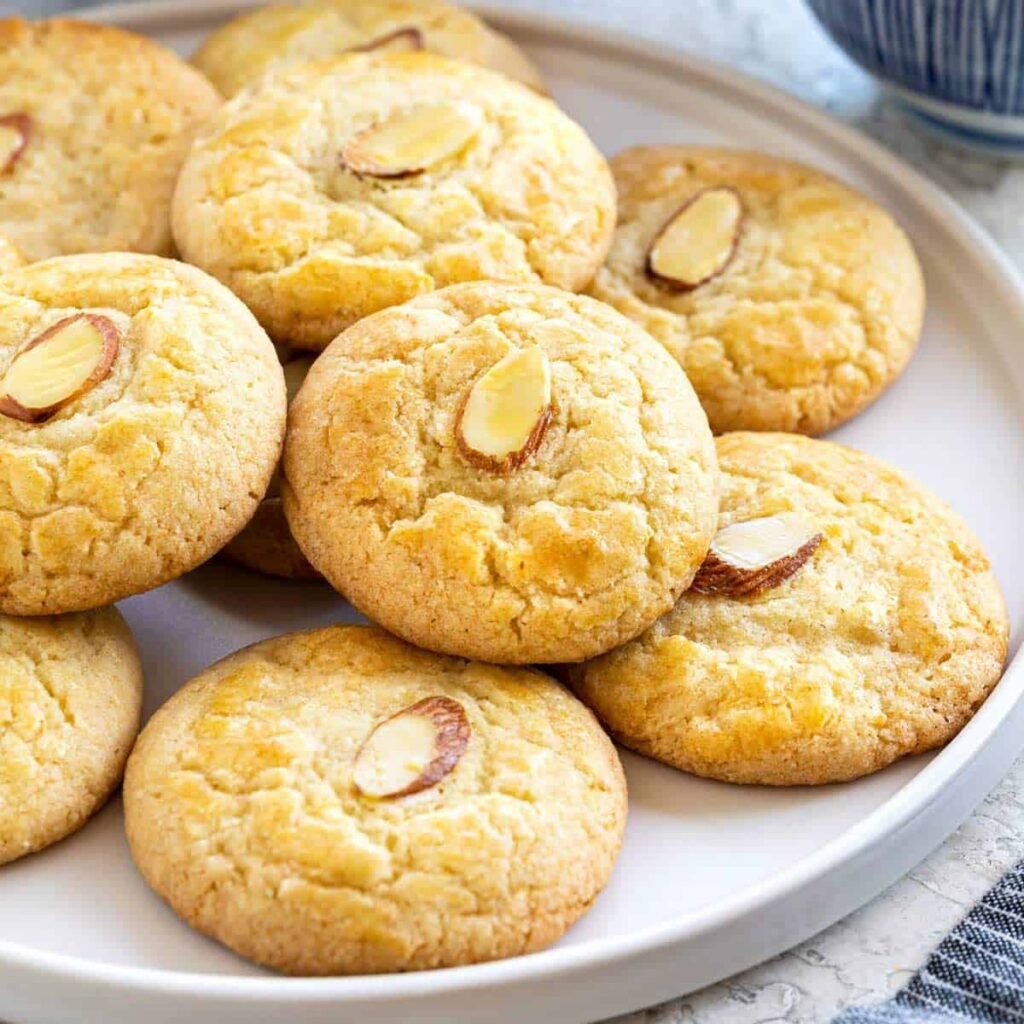
Chinese desserts – Almond Cookies

History:
Almond Cookies, a beloved Chinese dessert, have a history rooted in traditional Chinese baking techniques. Originating from southern China, these cookies gained popularity for their delicate almond flavor and crisp texture. Initially crafted as a treat for festive occasions and celebrations, Almond Cookies have become a staple in Chinese bakeries and households, symbolizing good luck and sweetness in life.
Background:
In Chinese culture, almonds are associated with good fortune and positive energy. Almond Cookies encapsulate this symbolism, making them a favored choice during events like weddings, birthdays, and the Lunar New Year. The delicate balance of sweetness and the fragrance of almonds reflects the meticulous craftsmanship of Chinese bakers who perfected this delightful treat.
Region of Origin:
Almond Cookies have strong ties to southern Chinese regions such as Guangdong and Hong Kong, where almonds are commonly used in traditional desserts. As the popularity of these cookies grew, they spread throughout China and beyond, becoming a cherished part of Chinese cuisine worldwide.
Chinese desserts – Almond Cookies Ingredients:
- 1 cup unsalted butter, softened
- 1 cup granulated sugar
- 1 egg
- 1 teaspoon almond extract
- 2 1/2 cups all-purpose flour
- 1/2 cup almond flour
- 1/2 teaspoon baking powder
- 1/4 teaspoon salt
- Whole almonds for decoration (optional)
Chinese desserts – Almond Cookies Recipe:
1. Cream Butter and Sugar:
- In a mixing bowl, cream together softened butter and granulated sugar until light and fluffy.
2. Add Egg and Almond Extract:
- Beat in the egg and almond extract until well combined.
3. Combine Dry Ingredients:
- In a separate bowl, whisk together all-purpose flour, almond flour, baking powder, and salt.
4. Mix Wet and Dry Ingredients:
- Gradually add the dry ingredients to the wet ingredients, mixing until a smooth cookie dough forms.
5. Chill the Dough:
- Wrap the cookie dough in plastic wrap and refrigerate for at least 1 hour, or until firm.
6. Preheat Oven:
- Preheat the oven to 350°F (180°C) and line baking sheets with parchment paper.
7. Shape Cookies:
- Pinch off portions of the chilled dough and roll them into balls. Place each ball on the prepared baking sheets.
8. Flatten and Decorate:
- Use the bottom of a glass to flatten each cookie ball slightly. Optionally, press a whole almond into the center for decoration.
9. Bake Almond Cookies:
- Bake in the preheated oven for 12-15 minutes, or until the edges are golden brown.
10. Cool and Enjoy:
- Allow the Almond Cookies to cool on the baking sheets for a few minutes before transferring them to a wire rack to cool completely.
11. Savor the Symbolism:
- Enjoy the delightful crunch and almond-infused sweetness of Almond Cookies, a treat deeply embedded in Chinese culinary traditions and symbolic of good fortune and joy.
Chinese Desserts – Chocolate Chinese Five-Spice Cake

History:
The Chocolate Chinese Five-Spice Cake is a delightful fusion dessert that combines the richness of chocolate with the aromatic blend of traditional Chinese five-spice powder. This innovative creation reflects the evolving landscape of Chinese cuisine, where traditional flavors meet modern culinary techniques. While the exact origin is challenging to trace, this cake showcases the creative spirit of chefs embracing diverse influences.
Background:
Chinese five-spice powder, a blend of star anise, cloves, Chinese cinnamon, Sichuan pepper, and fennel seeds, is a staple in Chinese cuisine. Infusing this spice blend into a chocolate cake adds a unique depth of flavor, marrying the familiarity of chocolate with the warmth and complexity of Chinese spices. The Chocolate Chinese Five-Spice Cake has become a symbol of culinary fusion, celebrating the harmony of different culinary traditions.
Region of Origin:
While the concept of incorporating Chinese five-spice powder into desserts is found throughout China, this particular fusion dessert has gained popularity in various regions with diverse culinary influences. It represents a contemporary approach to baking that transcends regional boundaries.
Chinese Desserts – Chocolate Chinese Five-Spice Cake Ingredients:
- 1 cup all-purpose flour
- 1/2 cup cocoa powder
- 1 teaspoon Chinese five-spice powder
- 1/2 teaspoon baking powder
- 1/4 teaspoon baking soda
- 1/4 teaspoon salt
- 1/2 cup unsalted butter, softened
- 1 cup granulated sugar
- 2 large eggs
- 1 teaspoon vanilla extract
- 1/2 cup buttermilk
- 1/2 cup hot water
- Chocolate ganache for topping (optional)
Chinese Desserts – Chocolate Chinese Five-Spice Cake Recipe:
1. Preheat Oven:
- Preheat the oven to 350°F (180°C) and grease a cake pan.
2. Mix Dry Ingredients:
- In a bowl, sift together flour, cocoa powder, Chinese five-spice powder, baking powder, baking soda, and salt. Set aside.
3. Cream Butter and Sugar:
- In another bowl, cream together softened butter and granulated sugar until light and fluffy.
4. Add Eggs and Vanilla:
- Beat in the eggs one at a time, then add the vanilla extract. Mix until well combined.
5. Alternate Wet and Dry Ingredients:
- Gradually add the dry ingredients to the wet ingredients, alternating with buttermilk. Begin and end with the dry ingredients.
6. Add Hot Water:
- Mix in the hot water until the batter is smooth. The batter will be thin, but that is normal.
7. Bake the Cake:
- Pour the batter into the prepared cake pan and bake in the preheated oven for 25-30 minutes, or until a toothpick inserted into the center comes out clean.
8. Cool the Cake:
- Allow the cake to cool in the pan for 10 minutes, then transfer it to a wire rack to cool completely.
9. Optional: Top with Ganache:
- For an extra indulgence, spread chocolate ganache over the cooled cake.
10. Slice and Enjoy:
- Slice the Chocolate Chinese Five-Spice Cake and savor the unique blend of chocolate and traditional Chinese spices in each delectable bite.
11. Experience Fusion Delight:
- Immerse yourself in the delightful fusion of flavors with the Chocolate Chinese Five-Spice Cake, a testament to the creativity and versatility of modern Chinese desserts.
Chinese Desserts – Eight-Treasure Rice Pudding

History:
Eight-Treasure Rice Pudding, known as “Ba Bao Fan” in Mandarin, has a history deeply rooted in Chinese culinary traditions, dating back centuries. Originating from the Tang Dynasty, this dessert holds cultural significance and is often associated with festive occasions and celebrations. The name “Eight-Treasure” refers to the variety of ingredients used, symbolizing abundance, prosperity, and good fortune.
Background:
Eight-Treasure Rice Pudding showcases the meticulous craftsmanship of Chinese dessert-making. The combination of glutinous rice, sweet red bean paste, and a medley of dried fruits and nuts creates a harmonious blend of textures and flavors. This dessert not only satisfies the palate but also embodies the cultural symbolism of unity and prosperity.
Region of Origin:
Eight-Treasure Rice Pudding is popular across China, but its roots can be traced to northern regions, particularly Beijing. As a dessert that transcends regional boundaries, variations of this dish can be found in different parts of the country, each incorporating local ingredients while maintaining the essence of the traditional recipe.
Chinese Desserts – Eight-Treasure Rice Pudding Ingredients:
- 1 cup glutinous rice
- 1/2 cup sweet red bean paste
- 1/4 cup dried goji berries
- 1/4 cup dried jujubes (red dates), pitted and chopped
- 1/4 cup dried lotus seeds
- 1/4 cup dried longan
- 1/4 cup dried apricots, chopped
- 1/4 cup walnuts, chopped
- 1/4 cup raisins
- 1/4 cup honey or sugar (for drizzling)
- Water for soaking and cooking
Chinese Desserts – Eight-Treasure Rice Pudding Recipe:
1. Soak Glutinous Rice:
- Soak the glutinous rice in water for at least 2 hours or overnight.
2. Prepare Ingredients:
- Rinse and drain the soaked glutinous rice.
- Soak the dried goji berries, jujubes, lotus seeds, and dried longan in separate bowls of water.
3. Cook Glutinous Rice:
- Steam the soaked glutinous rice until it becomes sticky and cooked.
4. Prepare Filling Ingredients:
- Drain the soaked goji berries, jujubes, lotus seeds, and dried longan.
- Combine the drained ingredients with chopped dried apricots, walnuts, and raisins.
5. Layer the Pudding:
- In a heatproof bowl or mold, layer the cooked glutinous rice with the sweet red bean paste and the mixed filling ingredients.
6. Steam the Pudding:
- Steam the layered pudding over high heat for about 30-40 minutes, or until the flavors meld, and the rice is fully cooked.
7. Drizzle with Honey or Sugar:
- Once steamed, drizzle honey or sprinkle sugar over the top for added sweetness.
8. Serve Warm:
- Eight-Treasure Rice Pudding is best enjoyed warm. Cut into slices and serve, savoring the diverse textures and flavors in each bite.
9. Celebrate Prosperity:
- Embrace the tradition and symbolism of Eight-Treasure Rice Pudding, celebrating the richness of Chinese culture and the promise of prosperity with each delectable spoonful.
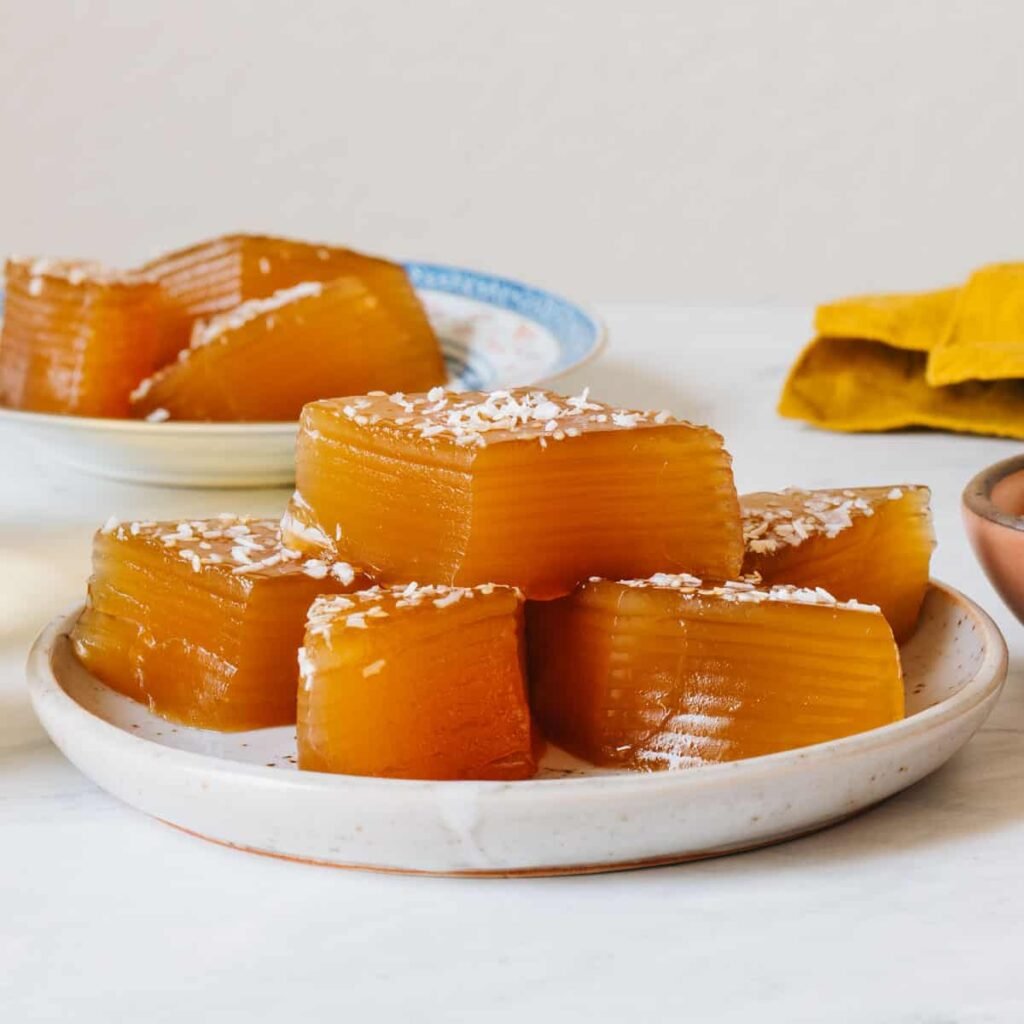
Chinese Desserts – Tapioca Thousand Layer Cake (菱粉糍/千層糕)

History:
The Tapioca Thousand Layer Cake, known as “Qian Nian Gao” in Mandarin, has a history steeped in the culinary traditions of southern China. Originating from the Guangdong province, this delicacy boasts a legacy of craftsmanship dating back to the Ming and Qing dynasties. The name “Thousand Layer” refers to the meticulous process of creating multiple layers of tapioca starch, resulting in a cake with a unique texture and a rich cultural heritage.
Background:
Tapioca Thousand Layer Cake exemplifies the skillful artistry of Chinese dessert-making. Composed of translucent layers with a chewy and slightly sweet taste, this cake offers a delightful contrast in textures. Often served during festive occasions and celebrations, it represents the intricate fusion of simplicity and complexity in Chinese culinary traditions.
Region of Origin:
The Tapioca Thousand Layer Cake originates from the southern regions of China, particularly Guangdong province. This area is renowned for its vibrant culinary scene and the use of tapioca starch in various traditional desserts. Over time, the popularity of this cake has spread, becoming a cherished part of Chinese dessert culture.
Chinese Desserts – Tapioca Thousand Layer Cake Ingredients:
- 1 cup tapioca starch
- 1 1/2 cups water
- 1 cup granulated sugar
- 1/2 cup coconut milk
- 1/4 cup cornstarch (for dusting)
- Sesame seeds for garnish (optional)
Chinese Desserts – Tapioca Thousand Layer Cake Recipe:
1. Prepare Tapioca Starch Mixture:
- In a bowl, mix tapioca starch with water, ensuring a smooth and lump-free consistency.
2. Cook Tapioca Starch Mixture:
- Cook the tapioca starch mixture over medium heat, stirring continuously until it thickens to a pudding-like consistency.
3. Add Sugar and Coconut Milk:
- Add granulated sugar to the tapioca mixture, stirring until fully dissolved.
- Pour in coconut milk and continue stirring until well combined.
4. Simmer and Thicken:
- Allow the mixture to simmer over low heat, stirring consistently until it thickens further. The goal is to achieve a dense, pudding-like texture.
5. Prepare Mold:
- Grease a square or rectangular mold with a thin layer of oil.
6. Pour Tapioca Mixture:
- Pour a thin layer of the tapioca mixture into the mold, spreading it evenly.
7. Steam the Layer:
- Steam the first layer over high heat for 5-7 minutes, or until it solidifies.
8. Repeat Layering and Steaming:
- Repeat the process, layering and steaming the tapioca mixture until you use up all the mixture. Each layer should solidify before adding the next.
9. Cool and Dust with Cornstarch:
- Allow the Tapioca Thousand Layer Cake to cool to room temperature.
- Dust the top with a thin layer of cornstarch to prevent sticking.
10. Slice and Garnish:
- Cut the cake into squares or rectangles.
- Optionally, garnish with sesame seeds for added texture.
11. Serve and Enjoy:
- Tapioca Thousand Layer Cake is best enjoyed at room temperature. Experience the delightful chewiness and subtle sweetness in each layer.
12. Celebrate Tradition:
- Indulge in the timeless tradition of the Tapioca Thousand Layer Cake, savoring the unique textures and flavors that have been cherished for generations in southern China.
Chinese Desserts – Bing Tanghulu Candied Hawthorn Stick 冰糖葫蘆

History:
Bing Tanghulu, or Candied Hawthorn Stick, is a popular Chinese street food with a history dating back to ancient times. Originating from northern China during the Song Dynasty, this sweet treat has evolved over the centuries. Initially made with hawthorn berries, it has transformed into a versatile snack where various fruits, often on skewers, are coated in a crunchy layer of sugar syrup. Bing Tanghulu remains a beloved and nostalgic snack enjoyed across China, especially during festive seasons.
Background:
The creation of Bing Tanghulu involves a traditional candying technique that imparts a delightful balance of sweetness and tartness to the chosen fruits. The use of hawthorn berries in the early days reflects the availability of this fruit in northern regions. Today, Bing Tanghulu showcases a colorful array of fruits, creating a visually appealing and delectable street food experience.
Region of Origin:
Bing Tanghulu is deeply rooted in the culinary traditions of northern China, particularly in cities like Beijing. However, its popularity has spread nationwide, and variations with different fruits can be found throughout the country, showcasing the adaptability and creativity within Chinese street food culture.
Chinese Desserts – Bing Tanghulu Candied Hawthorn Stick Ingredients:
- 1 cup hawthorn berries or a variety of fruits (grapes, strawberries, or other preferred fruits)
- 1 cup granulated sugar
- 1/2 cup water
- Bamboo skewers or toothpicks for skewering
Chinese Desserts – Bing Tanghulu Candied Hawthorn Stick Recipe:
1. Prepare Fruits:
- If using hawthorn berries, remove the seeds. For other fruits like grapes or strawberries, ensure they are clean and dry.
2. Skewer the Fruits:
- Skewer the fruits onto bamboo sticks or toothpicks, leaving some space between each piece.
3. Make Sugar Syrup:
- In a saucepan, combine granulated sugar and water over medium heat, stirring until the sugar dissolves.
4. Cook Sugar Syrup:
- Allow the sugar syrup to come to a gentle boil. Continue boiling until it reaches the hard crack stage (300°F or 149°C on a candy thermometer).
5. Dip and Coat:
- Dip each skewered fruit into the hot sugar syrup, ensuring an even coating.
6. Set on Parchment Paper:
- Place the coated fruits on parchment paper to cool and harden.
7. Repeat for Additional Layers:
- Optionally, repeat the dipping process for additional layers of sugar coating, allowing each layer to cool before applying the next.
8. Cool Completely:
- Allow the Bing Tanghulu to cool completely until the sugar coating hardens.
9. Serve and Enjoy:
- Bing Tanghulu is best enjoyed once the sugar coating is crisp. Serve and savor the delightful combination of sweetness and tartness in each crunchy bite.
10. Experience Street Food Delight:
- Embrace the charm of Chinese street food with Bing Tanghulu, a timeless treat that captures the essence of sweet indulgence and culinary craftsmanship.
Chinese Desserts – Jujube Date Sticky Rice Cake

History:
The Jujube Date Sticky Rice Cake, also known as “Hong Zao Nian Gao” in Mandarin, has a storied history embedded in Chinese culture. Originating from the Guangdong province, this traditional dessert has been enjoyed for centuries, especially during the Lunar New Year festivities. The use of jujube dates in the recipe symbolizes prosperity, and the sticky rice cake itself signifies a harmonious and cohesive family bond. As families gather to celebrate, the Jujube Date Sticky Rice Cake remains a cherished symbol of good fortune.
Background:
Crafting the Jujube Date Sticky Rice Cake involves a careful blend of glutinous rice flour, jujube dates, and other ingredients. The sticky and chewy texture of the cake represents the wish for a “sticky” and close-knit family, while the addition of jujube dates imparts a natural sweetness and auspicious symbolism. This dessert is not only a culinary delight but also a cultural emblem expressing hopes for a prosperous and connected future.
Region of Origin:
The Jujube Date Sticky Rice Cake hails from the Guangdong province in southern China. Its popularity has spread across various regions, making it a beloved treat enjoyed during festive occasions and family gatherings throughout the country.
Chinese Desserts – Jujube Date Sticky Rice Cake Ingredients:
- 2 cups glutinous rice flour
- 1 cup water
- 1 cup jujube dates, pitted and finely chopped
- 1/2 cup brown sugar or honey
- 1/4 cup vegetable oil
- 1/2 teaspoon baking powder
- Sesame seeds for garnish (optional)
Chinese Desserts – Jujube Date Sticky Rice Cake Recipe:
1. Prepare Jujube Dates:
- Pit and finely chop the jujube dates, ensuring they are free from pits.
2. Mix Glutinous Rice Flour and Water:
- In a bowl, combine glutinous rice flour and water, stirring until a smooth batter forms.
3. Add Sweetener and Oil:
- Mix in brown sugar or honey and vegetable oil, ensuring even distribution.
4. Fold in Jujube Dates:
- Gently fold the chopped jujube dates into the batter.
5. Incorporate Baking Powder:
- Add baking powder to the batter, mixing well to ensure even leavening.
6. Prepare Steamer:
- Grease a round or square cake pan and set up a steamer.
7. Pour Batter into Pan:
- Pour the batter into the greased pan, spreading it evenly.
8. Steam the Cake:
- Steam the cake over medium-high heat for approximately 30-40 minutes or until a toothpick inserted into the center comes out clean.
9. Cool and Garnish:
- Allow the Jujube Date Sticky Rice Cake to cool completely before removing it from the pan.
- Optionally, garnish with sesame seeds for added texture.
10. Slice and Serve:
- Slice the cake into squares or wedges. The sticky and chewy texture is a testament to the successful steaming process.
11. Celebrate with Sweetness:
- Celebrate moments of joy and togetherness with the Jujube Date Sticky Rice Cake, a delectable Chinese dessert that embodies the spirit of tradition and familial bonds.
Chinese Desserts – Sachima

History:
Sachima, a beloved Chinese sweet treat, has its roots in the Mongolian and Inner Mongolian nomadic cultures. Originating from the vast grasslands of northern China, Sachima has become a widespread favorite, transcending regional boundaries. The traditional preparation involves simple ingredients like flour, eggs, and sugar, reflecting the resourcefulness of nomadic communities. Over time, Sachima has evolved into various regional and modern interpretations, solidifying its place as a classic Chinese dessert.
Background:
Sachima, also known as “Shaqima” or “Saqima,” boasts a delightful combination of crispy and chewy textures. The dough is typically deep-fried and coated in a sweet syrup, resulting in a golden-brown exterior. This dessert embodies the spirit of simplicity and nomadic ingenuity, making it a popular choice during festivals and celebrations.
Region of Origin:
While Sachima originated in the northern grasslands of China, particularly among Mongolian and Inner Mongolian communities, it has become a beloved dessert throughout China. Its adaptability and versatility have led to variations in different regions, showcasing the dessert’s ability to bridge cultural and geographical gaps.
Chinese Desserts – Sachima Ingredients:
- 2 cups all-purpose flour
- 2 eggs
- 1/2 cup sugar
- 1/4 cup melted unsalted butter
- 1/4 cup milk
- 1/2 teaspoon baking powder
- Vegetable oil for deep-frying
- For the Syrup Coating:
- 1/2 cup water
- 1 cup sugar
- 1 tablespoon maltose or honey
Chinese Desserts – Sachima Recipe:
1. Prepare Dough:
- In a large bowl, whisk together eggs and sugar until well combined.
- Add melted butter and milk, mixing thoroughly.
- Sift in the flour and baking powder, stirring until a smooth dough forms.
2. Rest the Dough:
- Allow the dough to rest for at least 30 minutes to relax the gluten.
3. Roll and Cut:
- On a floured surface, roll out the dough to a 1/4-inch thickness.
- Cut the dough into rectangular strips or desired shapes.
4. Deep-Fry the Strips:
- Heat vegetable oil for deep-frying to 350°F (180°C).
- Deep-fry the dough strips until golden brown and puffed. Remove and drain on paper towels.
5. Prepare the Syrup:
- In a saucepan, combine water and sugar for the syrup. Bring to a boil, stirring until the sugar dissolves.
- Add maltose or honey to the syrup, simmering until it thickens slightly.
6. Coat the Sachima:
- Dip each fried dough strip into the syrup, ensuring an even coating. Allow excess syrup to drip off.
7. Cool and Set:
- Place the coated Sachima on a wire rack to cool and allow the syrup to set.
8. Slice and Serve:
- Once the syrup has set, slice the Sachima into bite-sized pieces.
9. Enjoy the Crispy-Chewy Delight:
- Indulge in the delightful contrast of crispy and chewy textures with Sachima, a classic Chinese dessert that transcends cultural origins to become a cherished treat across the nation.
Chinese Desserts – Chinese Walnut Cookies

History:
Chinese Walnut Cookies, known as “Hetao Su,” have a history deeply rooted in Chinese culinary traditions. Originating from the northern regions, particularly in Shanxi province, these cookies showcase the abundant use of walnuts—a nut with cultural significance in China. Traditionally enjoyed during festive occasions, Chinese Walnut Cookies have evolved over the years, blending the rich nutty flavor of walnuts with a delicate sweetness, making them a beloved treat across the country.
Background:
Chinese Walnut Cookies are characterized by their crumbly texture and the distinct taste of roasted walnuts. The combination of ground walnuts and a buttery cookie base reflects the craftsmanship of Chinese bakers who have perfected this delightful confection. The cookies are often shaped like walnuts, adding a visual appeal that complements the nutty taste.
Region of Origin:
The recipe for Chinese Walnut Cookies originates from Shanxi province in northern China, where walnuts are locally grown and appreciated. As the popularity of these cookies has grown, variations can be found throughout China, with each region adding its unique twist to this classic treat.
Ingredients:
- 1 cup walnuts, finely chopped or ground
- 1 cup all-purpose flour
- 1/2 cup unsalted butter, softened
- 1/2 cup powdered sugar
- 1/4 cup cornstarch
- 1/4 teaspoon salt
- Whole walnut halves for decoration (optional)
Recipe:
1. Prepare Walnuts:
- Finely chop or grind walnuts until they reach a coarse powder consistency.
2. Cream Butter and Sugar:
- In a mixing bowl, cream together softened butter and powdered sugar until light and fluffy.
3. Combine Dry Ingredients:
- In a separate bowl, whisk together all-purpose flour, cornstarch, and salt.
4. Mix in Ground Walnuts:
- Add the ground walnuts to the creamed butter and sugar mixture, mixing until well combined.
5. Incorporate Dry Ingredients:
- Gradually add the dry ingredients to the walnut-butter mixture, mixing until a soft cookie dough forms.
6. Shape Cookies:
- Take portions of the dough and shape them into walnut-sized balls. Optionally, press a whole walnut half into the top of each cookie for decoration.
7. Chill the Cookies:
- Place the shaped cookies on a baking sheet and refrigerate for at least 30 minutes to firm up.
8. Preheat Oven:
- Preheat the oven to 350°F (180°C).
9. Bake Cookies:
- Bake the chilled cookies in the preheated oven for 12-15 minutes or until the edges are lightly golden.
10. Cool and Enjoy:
- Allow the Chinese Walnut Cookies to cool on the baking sheet for a few minutes before transferring them to a wire rack to cool completely.
11. Savor the Nutty Goodness:
- Indulge in the delightful nutty flavor and crumbly texture of Chinese Walnut Cookies, a timeless treat that brings together the warmth of walnuts and the sweetness of tradition.
Chinese Desserts – Water Chestnut Cake

History:
Water Chestnut Cake, also known as “Mati Gao” or “Ma Ti Gao” in Cantonese, is a classic Chinese dessert with a history rooted in the culinary traditions of Guangdong province. Originating from the dim sum culture of southern China, this sweet delicacy has been enjoyed for centuries. Water chestnuts, a key ingredient, add a unique crunch to the cake. The historical significance lies in its association with Chinese New Year, symbolizing prosperity and good fortune.
Background:
Water Chestnut Cake embodies a harmonious blend of textures and flavors. The combination of water chestnut starch, sugar, and water results in a jelly-like cake with a refreshing taste. Typically served in small, translucent squares, Water Chestnut Cake reflects the meticulous craftsmanship of Cantonese pastry chefs who have perfected this delightful treat.
Region of Origin:
The recipe for Water Chestnut Cake originated in Guangdong province, particularly in the city of Guangzhou. As one of the major hubs of Cantonese cuisine, the popularity of Water Chestnut Cake has spread across various regions in China and beyond, making it a staple in dim sum establishments.
Chinese Desserts – Water Chestnut Cake Ingredients:
- 1 cup water chestnut starch
- 1 1/2 cups water
- 1/2 cup sugar
- 1 cup peeled and finely grated water chestnuts
- 1/4 cup vegetable oil (for greasing)
- Sesame seeds for garnish (optional)
Chinese Desserts – Water Chestnut Cake Recipe:
1. Prepare Water Chestnuts:
- Peel and finely grate the water chestnuts.
2. Mix Water Chestnut Starch:
- In a bowl, mix water chestnut starch with water until well combined.
3. Cook Sugar Syrup:
- In a saucepan, dissolve sugar in water over low heat to create a sugar syrup.
4. Combine Starch Mixture and Syrup:
- Gradually pour the water chestnut starch mixture into the sugar syrup, stirring continuously to avoid lumps.
5. Add Grated Water Chestnuts:
- Add the grated water chestnuts to the mixture, stirring until well incorporated.
6. Cook the Mixture:
- Continue to cook the mixture over low heat, stirring constantly until it thickens to a pudding-like consistency.
7. Grease Molds:
- Lightly grease molds or a square cake pan with vegetable oil.
8. Pour Mixture into Molds:
- Pour the cooked mixture into the prepared molds, smoothing the surface.
- Allow the Water Chestnut Cake to set at room temperature. Once set, refrigerate for a few hours or overnight until completely firm.
9. Cut into Squares:
- Carefully unmold the set cake and cut it into small, bite-sized squares.
- Optionally, garnish the Water Chestnut Cake with sesame seeds for added texture.
10. Serve and Enjoy:
- Serve the Water Chestnut Cake chilled, savoring the refreshing taste and unique crunch of water chestnuts in each delightful bite.
- Embrace the tradition of dim sum with Water Chestnut Cake, a delectable Cantonese dessert that encapsulates the esse
Chinese Desserts – Winter Melon Puff (Wife Biscuit or Sweet Heart Cake 老婆饼)

History:
The Winter Melon Puff, also known as “Laopo Bing” or “Wife Biscuit,” has a storied history originating from the culinary traditions of Guangdong, China.
This delectable pastry is often associated with marriage, and legend has it that husbands would gift these sweet treats to their wives, hence the name “Wife Biscuit.” With a flaky exterior and a sweet winter melon filling, these pastries have become a symbol of love and celebration in Chinese culture.
Background:
The Winter Melon Puff is distinguished by its intricate layers of pastry that encase a filling made from winter melon, sugar, and sometimes almond paste. The delicate balance of sweetness and flakiness showcases the craftsmanship of Cantonese pastry chefs. Today, these pastries are enjoyed not only during weddings but also as a delightful treat during various celebrations and festive occasions.
Region of Origin:
Originating from Guangdong province, the Winter Melon Puff is a staple in the dim sum culture of cities like Guangzhou. The popularity of these pastries has extended beyond the region, making them a cherished part of Chinese pastry offerings worldwide.
Chinese Desserts – Winter Melon Puff Ingredients:
- For the Pastry:
- 2 cups all-purpose flour
- 1 cup unsalted butter, chilled and cubed
- 1/2 cup water, chilled
- 1/4 teaspoon salt
- For the Filling:
- 2 cups winter melon, finely grated
- 1 cup granulated sugar
- 1/4 cup almond paste (optional for added flavor)
- Sesame seeds for garnish (optional)
Chinese Desserts – Winter Melon Puff Recipe:
1. Prepare Pastry Dough:
- In a bowl, combine all-purpose flour and salt. Cut in chilled, cubed butter until the mixture resembles coarse crumbs.
- Gradually add chilled water, mixing until the dough comes together. Shape the dough into a rectangle, wrap in plastic, and refrigerate for at least 30 minutes.
2. Make Winter Melon Filling:
- Finely grate the winter melon. Place it in a cheesecloth or kitchen towel and squeeze out excess moisture.
- In a bowl, mix grated winter melon with granulated sugar. Optionally, add almond paste for extra flavor.
3. Roll and Fold Pastry:
- Roll out the chilled dough into a rectangle on a floured surface. Fold the dough into thirds like a letter. Rotate, roll, and fold again. Repeat this process three times.
4. Shape Pastry Squares:
- After the final fold, roll out the dough and cut into squares for individual pastries.
5. Fill and Seal:
- Place a spoonful of the winter melon filling in the center of each pastry square. Fold and seal the edges.
6. Garnish (Optional):
- Optionally, sprinkle sesame seeds on top for a decorative touch.
7. Preheat Oven:
- Preheat the oven to 350°F (180°C).
8. Bake Pastries:
- Arrange the filled pastries on a baking sheet and bake for 20-25 minutes or until golden brown.
9. Cool and Enjoy:
- Allow the Winter Melon Puffs to cool on a wire rack. Once cooled, savor the flaky layers and sweet winter melon filling.
10. Celebrate Love and Tradition:
- Embrace the symbolism of love and celebration with Winter Melon Puffs, a delightful treat that carries the essence of Guangdong’s rich pastry heritage.
Chinese Desserts – Dragon’s Beard Candy

History:
Dragon’s Beard Candy, also known as “Long Xu Tang,” is a traditional Chinese sweet with roots dating back to the imperial courts of the Han Dynasty. Legend has it that the candy-making technique was inspired by observing the fine threads of a dragon’s beard. Initially reserved for royalty, Dragon’s Beard Candy eventually became a popular treat enjoyed during festive occasions, showcasing the artistry and skill of Chinese confectioners.
Background:
Crafting Dragon’s Beard Candy involves a meticulous process of pulling and stretching sugar to create thousands of fine strands resembling a dragon’s beard. These delicate threads enrobe a filling made of nuts, seeds, or dried fruit. The result is a confection that seamlessly blends the textures of silky threads and crunchy fillings, making it a unique and cherished part of Chinese culinary heritage.
Region of Origin:
Originating in China, Dragon’s Beard Candy has cultural significance and variations in various regions, particularly in northern China. It has spread to neighboring countries, each adding its twist to the recipe, yet the essence of this ancient sweet remains deeply rooted in Chinese tradition.
Chinese Desserts – Dragon’s Beard Candy Ingredients:
- For the Candy:
- 2 cups granulated sugar
- 1/2 cup water
- Cornstarch for dusting
- For the Filling:
- Nuts (peanuts, almonds, or other preferred nuts)
- Sesame seeds
- Coconut flakes
- Dried fruit (optional)
Chinese Desserts – Dragon’s Beard Candy Recipe:
1. Prepare Filling:
- Roast nuts, sesame seeds, and coconut flakes in a dry pan until aromatic. Chop dried fruit if using.
2. Make Sugar Syrup:
- In a saucepan, dissolve sugar in water over low heat, stirring until sugar is fully dissolved.
3. Cook Sugar Syrup:
- Bring the sugar syrup to a boil and continue cooking until it reaches the hard crack stage (about 300°F or 149°C).
4. Cool and Pull Sugar:
- Allow the sugar syrup to cool slightly. Using oiled hands, pull and stretch the syrup repeatedly until it forms fine threads.
5. Assemble Candy:
- Dust the stretched sugar with cornstarch to prevent sticking.
- Place a small amount of the nut and seed filling in the center of the sugar threads.
6. Encase Filling:
- Fold the sugar threads over the filling, sealing it within the candy.
7. Stretch and Twist:
- Continue stretching and twisting the sugar threads to form multiple layers around the filling.
8. Repeat for Multiple Layers:
- Repeat the process, adding layers of sugar threads until the desired thickness is achieved.
9. Cut and Shape:
- Using oiled scissors, cut the candy into bite-sized pieces. Shape and mold as needed.
10. Serve and Enjoy:
- Dragon’s Beard Candy is best enjoyed fresh. Serve and savor the delicate threads and crunchy filling.
11. Embrace Culinary Artistry:
- Experience the artistry of Chinese confectionery with Dragon’s Beard Candy, a timeless treat that weaves together the elegance of imperial inspiration and the rich tapestry of Chinese culinary heritage.
Chinese Desserts – Tangyuan (Sweet Rice Balls with Peanut Butter Filling)

History:
Tangyuan, a classic Chinese dessert, has a history deeply rooted in Chinese culture and traditions, particularly associated with the Lantern Festival. The round shape of Tangyuan symbolizes family unity and harmony. Originating during the Song Dynasty, this sweet treat has evolved over the centuries, becoming a cherished part of festive celebrations, family gatherings, and winter solstice rituals.
Background:
Tangyuan are sweet rice balls traditionally filled with various sweet fillings like sesame paste, red bean paste, or peanuts. The act of making and sharing Tangyuan holds cultural significance, representing the desire for a happy and complete family. The comfort of these warm, chewy rice balls reflects the warmth of togetherness and the sweetness of life’s shared moments.
Region of Origin:
Tangyuan is enjoyed throughout China, with regional variations in both the filling and the preparation method. It is particularly popular during the Lantern Festival, marking the end of the Chinese New Year celebrations. Variations of Tangyuan are found in different regions, showcasing the diversity of Chinese culinary traditions.
Chinese Desserts – Tangyuan Ingredients:
- For the Tangyuan Dough:
- 2 cups glutinous rice flour
- Water (as needed)
- For the Peanut Butter Filling:
- 1 cup roasted peanuts, finely ground
- 1/2 cup sugar
- 2 tablespoons peanut butter
- For Cooking and Serving:
- Water for boiling
- Additional sugar for coating (optional)
Chinese Desserts – Tangyuan Recipe:
1. Prepare Peanut Butter Filling:
- In a bowl, mix finely ground roasted peanuts, sugar, and peanut butter until a cohesive filling is formed.
2. Make Tangyuan Dough:
- In a large bowl, gradually add water to glutinous rice flour, stirring until a smooth and elastic dough forms.
3. Shape Tangyuan Balls:
- Take a small portion of the dough and flatten it in your palm. Place a teaspoon of the peanut butter filling in the center and seal the edges, forming a round ball.
4. Boil Water:
- Bring a pot of water to a boil.
5. Boil Tangyuan:
- Gently drop the Tangyuan balls into the boiling water. Stir gently to prevent sticking.
6. Cook Until Floating:
- Cook the Tangyuan until they float to the surface, indicating they are cooked. This usually takes about 5-7 minutes.
7. Drain and Serve:
- Using a slotted spoon, carefully remove the cooked Tangyuan and place them in a bowl or on a plate.
8. Coat with Sugar (Optional):
- Optionally, coat the Tangyuan with sugar for an extra sweet touch.
9. Serve Warm:
- Tangyuan are best enjoyed warm. Serve them in a bowl with some of the cooking water for a comforting dessert.
10. Celebrate Togetherness:
- Embrace the joyous tradition of Tangyuan, a sweet and symbolic treat that brings families together, especially during festive occasions and the Lantern Festival.
Chinese Desserts – Fortune Cookies

History:
Fortune Cookies, though widely associated with Chinese cuisine, have an intriguing history with uncertain origins. While often attributed to Chinese immigrants in California during the early 20th century, the exact creator and origin remain debated. Initially known as “fortune tea cakes,” these cookies gained popularity and became synonymous with Chinese-American dining experiences. Today, they are an iconic part of many Chinese restaurants worldwide, offering whimsical messages inside the crisp, folded cookies.
Background:
Fortune Cookies are characterized by their thin, crisp exterior and a small slip of paper containing a fortune or prophecy. The act of receiving and sharing these messages adds an element of surprise and tradition to the dining experience. Despite their uncertain origin, Fortune Cookies have become a symbol of good luck and a lighthearted conclusion to a Chinese meal.
Region of Origin:
Fortune Cookies are strongly associated with Chinese-American cuisine, particularly in the United States. While not a traditional Chinese dessert, they have become an integral part of the dining experience in Chinese restaurants globally.
Chinese Desserts – Fortune Cookies Ingredients:
- For the Fortune Cookies:
- 2 large egg whites
- 1/2 cup granulated sugar
- 1/2 cup unsalted butter, melted
- 1/4 teaspoon vanilla extract
- 1/4 teaspoon almond extract
- 1/2 cup all-purpose flour
- 2 tablespoons cornstarch
- Pinch of salt
- 2 tablespoons water (for thinning batter if needed)
- Fortunes:
- Small strips of paper with written fortunes
Chinese Desserts – Fortune Cookies Recipe:
1. Preheat Oven:
- Preheat the oven to 350°F (180°C). Line a baking sheet with parchment paper.
2. Prepare Fortunes:
- Write or print fortunes on small strips of paper, keeping them concise.
3. Make Batter:
- In a bowl, whisk egg whites until frothy. Add sugar, melted butter, vanilla extract, and almond extract, mixing until well combined.
4. Add Dry Ingredients:
- Sift in all-purpose flour, cornstarch, and a pinch of salt. Mix until a smooth batter forms.
5. Thin Batter (If Needed):
- If the batter is too thick, add water, one tablespoon at a time, until it reaches a thin, pourable consistency.
6. Bake Cookies:
- Spoon small circles of batter onto the prepared baking sheet, spreading them into thin, even rounds.
7. Bake Until Edges Brown:
- Bake for 8-10 minutes or until the edges of the cookies are lightly browned.
8. Place Fortunes:
- While the cookies are still warm, place a fortune in the center of each one.
9. Fold and Shape:
- Quickly fold the cookie in half, creating a half-moon shape. Press the folded edge over the rim of a cup or the edge of a bowl to achieve the classic Fortune Cookie shape.
10. Cool and Set:
- Allow the Fortune Cookies to cool and set before handling.
11. Share the Luck:
- Share these delightful Fortune Cookies at the end of a meal, and let the element of surprise and good fortune add a touch of whimsy to the dining experience.
12. Add Personalized Touch:
- Consider personalizing the fortunes with positive messages or playful predictions to enhance the fun and tradition of Fortune Cookies.
Chinese Desserts – Chinese Pineapple Tarts

History:
Chinese Pineapple Tarts, also known as “Feng Li Su” in Chinese, have a history intertwined with Chinese New Year celebrations. Originating from Southeast Asia, particularly in regions with Chinese communities, these delectable tarts gained popularity for their auspicious symbolism. The pineapple’s Hokkien pronunciation, “ong lai,” sounds similar to the phrase for “prosperity has arrived,” making these tarts a symbol of good fortune and abundance during festive occasions.
Background:
Chinese Pineapple Tarts are renowned for their buttery, melt-in-the-mouth pastry and sweet pineapple jam filling. The intricate designs, often shaped like pineapples or open flowers, showcase the craftsmanship of Chinese bakers. These tarts are not only a delightful treat but also a cultural emblem that represents the wish for prosperity and joy in the coming year.
Region of Origin:
Chinese Pineapple Tarts are popular in Southeast Asian countries with Chinese communities, including Singapore, Malaysia, and Indonesia. They have become an integral part of Chinese New Year celebrations and are enjoyed across various regions with unique local variations.
Chinese Desserts – Chinese Pineapple Tarts Ingredients:
- For the Pineapple Jam:
- 2 cups fresh pineapple, grated
- 1 cup granulated sugar
- 1 cinnamon stick
- 2 cloves
- For the Tart Pastry:
- 1 cup unsalted butter, softened
- 1/2 cup icing sugar
- 2 cups all-purpose flour
- 1/4 cup cornstarch
- 1/4 teaspoon salt
- For Glazing (Optional):
- 1 egg yolk, beaten
- 1 tablespoon milk
Chinese Desserts – Chinese Pineapple Tarts Recipe:
1. Prepare Pineapple Jam:
- Grate fresh pineapple and squeeze out excess juice.
- In a pan, combine grated pineapple, sugar, cinnamon stick, and cloves. Cook over low heat until the mixture thickens into a jam-like consistency. Allow to cool.
2. Make Tart Pastry:
- In a bowl, cream together softened butter and icing sugar until light and fluffy.
3. Combine Dry Ingredients:
- In a separate bowl, whisk together all-purpose flour, cornstarch, and salt.
4. Mix Pastry Dough:
- Gradually add the dry ingredients to the butter-sugar mixture, mixing until a soft dough forms.
5. Chill Dough:
- Shape the dough into a disc, wrap in plastic, and refrigerate for at least 30 minutes.
6. Preheat Oven:
- Preheat the oven to 350°F (180°C). Line baking sheets with parchment paper.
7. Shape Tarts:
- Roll out the chilled dough and use a pineapple tart mold or shape small portions by hand. Place a small ball of pineapple jam in the center.
8. Assemble Tarts:
- Encase the pineapple jam with the pastry, ensuring it is fully covered.
9. Glaze (Optional):
- Optionally, brush the tops of the tarts with a mixture of beaten egg yolk and milk for a golden finish.
10. Bake Tarts:
- Arrange the assembled tarts on the prepared baking sheets and bake for 15-20 minutes or until the pastry is golden brown.
11. Cool and Enjoy:
- Allow the Chinese Pineapple Tarts to cool on a wire rack before serving.
12. Celebrate Prosperity:
- Delight in the sweet and symbolic taste of Chinese Pineapple Tarts, celebrating the arrival of prosperity and joy during special occasions and festive gatherings.
Chinese Desserts – Chinese Sponge Cake Recipe

History:
Chinese Sponge Cake, known as “Ma Lai Gao” in Cantonese, has a history rooted in Chinese culinary traditions. Originating from Guangdong province, this steamed cake has become a beloved dessert, often enjoyed during dim sum or special occasions. The name “Ma Lai Gao” is said to be derived from the Malay word for “Malay,” reflecting the cultural exchanges between Chinese and Malay communities in the region.
Background:
Chinese Sponge Cake is characterized by its light and airy texture, making it a delightful treat. The cake is often steamed, resulting in a soft, spongy crumb that absorbs flavors well. With a subtle sweetness, Chinese Sponge Cake embodies the simplicity and elegance that defines traditional Chinese desserts.
Region of Origin:
The recipe for Chinese Sponge Cake originated in Guangdong province, particularly in cities like Guangzhou and Hong Kong. It has since spread to various regions, becoming a staple in Chinese bakeries and households worldwide.
Chinese Desserts – Chinese Sponge Cake Recipe Ingredients:
- Dry Ingredients:
- 1 cup all-purpose flour
- 1/2 cup granulated sugar
- 1/2 teaspoon baking powder
- 1/4 teaspoon baking soda
- Wet Ingredients:
- 3 large eggs
- 1/4 cup vegetable oil
- 1/4 cup milk
- 1 teaspoon vanilla extract
- Additional Flavor (Optional):
- Orange zest or pandan extract for added aroma
Chinese Desserts – Chinese Sponge Cake Recipe
1. Prepare Steamer:
- Fill a steamer with water and bring it to a simmer.
2. Prepare Cake Pan:
- Grease and line a round cake pan with parchment paper.
3. Sift Dry Ingredients:
- In a bowl, sift together all-purpose flour, granulated sugar, baking powder, and baking soda. Set aside.
4. Whisk Eggs:
- In a separate bowl, whisk eggs until well beaten.
5. Add Wet Ingredients:
- Add vegetable oil, milk, and vanilla extract to the beaten eggs. Mix well.
6. Combine Dry and Wet Ingredients:
- Gradually add the sifted dry ingredients to the wet ingredients, stirring until just combined. Avoid overmixing.
7. Add Additional Flavor (Optional):
- If desired, add orange zest or pandan extract to enhance the flavor.
8. Pour Batter into Cake Pan:
- Pour the batter into the prepared cake pan, smoothing the top.
9. Steam Cake:
- Place the cake pan in the steamer and cover. Steam the cake over simmering water for approximately 25-30 minutes or until a toothpick inserted into the center comes out clean.
10. Cool and Serve:
- Allow the Chinese Sponge Cake to cool in the pan for a few minutes before transferring it to a wire rack to cool completely.
11. Slice and Enjoy:
- Once cooled, slice the Chinese Sponge Cake into pieces and enjoy the light and fluffy texture.
12. Savor the Tradition:
- Savor the simplicity and elegance of Chinese Sponge Cake, a classic dessert that embodies the rich culinary heritage of Guangdong province and the cultural exchange between Chinese and Malay communities.
Chinese Desserts – Cocktail Buns (Coconut Buns)

History:
Cocktail Buns, also known as “Coconut Buns” or “Gai Mei Bao” in Cantonese, have a history deeply rooted in Hong Kong’s bakery culture. Originating in the vibrant streets of the city, these buns are a fusion of Chinese and Western flavors. The name “Cocktail Buns” reflects the visual resemblance of the coconut filling to a cocktail, while the bun’s creation signifies the culinary innovation born from cultural diversity.
Background:
Cocktail Buns are characterized by their soft, slightly sweet bread exterior and a rich, sweet coconut filling. The buns are often enjoyed as a snack or breakfast item, representing the delicious convergence of traditional Chinese baking techniques and the influence of global flavors.
Region of Origin:
The recipe for Cocktail Buns originated in Hong Kong, where local bakeries have perfected the art of creating these delightful treats. Over time, they have become popular in Chinese communities around the world, showcasing the culinary influence of Hong Kong’s vibrant food culture.
Chinese Desserts – Cocktail Buns (Coconut Buns) Ingredients:
Bun Dough:
- 3 cups all-purpose flour
- 1/4 cup granulated sugar
- 1 teaspoon salt
- 2 1/4 teaspoons active dry yeast
- 1 cup warm milk
- 1/4 cup unsalted butter, melted
For the Coconut Filling:
- 2 cups shredded coconut
- 1/2 cup granulated sugar
- 1/4 cup condensed milk
- 2 tablespoons unsalted butter, melted
- 1/4 cup milk
For the Topping:
- 1/4 cup all-purpose flour
- 1/4 cup powdered sugar
- 2 tablespoons unsalted butter, softened
Chinese Desserts – Cocktail Buns (Coconut Buns) Recipe:
1. Prepare Bun Dough:
- In a bowl, combine flour, sugar, and salt. In a separate bowl, dissolve yeast in warm milk.
- Add melted butter to the yeast mixture.
- Gradually add the wet ingredients to the dry ingredients, kneading until a soft, elastic dough forms.
- Allow the dough to rise in a warm place until doubled in size.
2. Make Coconut Filling:
- Mix shredded coconut, sugar, condensed milk, melted butter, and milk in a bowl until well combined. Set aside.
3. Shape the Buns:
- Punch down the risen dough and divide it into equal portions.
- Flatten each portion, add a generous amount of coconut filling, and seal the edges to form round buns.
4. Prepare Topping:
- Mix flour, powdered sugar, and softened butter to create a crumbly topping.
5. Top the Buns:
- Sprinkle the topping over each bun.
6. Second Rise:
- Allow the filled and topped buns to undergo a second rise until they become puffy.
7. Preheat Oven:
- Preheat the oven to 350°F (180°C).
8. Bake Buns:
- Bake the buns for approximately 15-20 minutes or until they turn golden brown.
9. Cool and Serve:
- Allow the Cocktail Buns to cool on a wire rack before serving.
10. Indulge in Cultural Fusion:
- Delight in the unique flavors of Cocktail Buns, a testament to the culinary fusion found in the streets of Hong Kong, combining the softness of Chinese buns with the sweetness of coconut filling in a harmonious blend.
Thats not All!! – Check out even more Chinese Recipes Below


- 24 Chinese Beef Recipes: Culinary Marvels Unveiled in 24 Dishes!
- 39 Delicious Chinese Pork Recipes: Magic Unleashed in 39 Amazing Dishes!
- Explore 41 additional Irresistibly Delicious Chinese Dessert Recipes That Will Leave You Craving More!
- 48 Mouthwatering Chinese Vegan Food Recipes

